
How to draw colorful characters in Photoshop
How to draw colorful characters in Photoshop
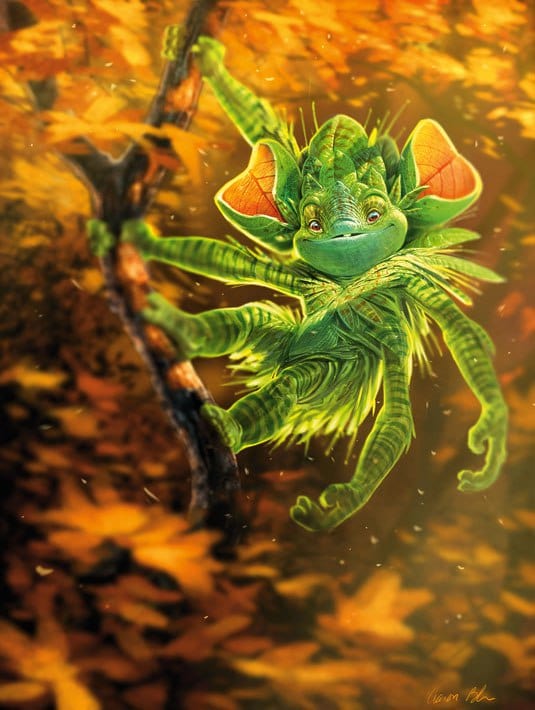
Popular artist Aaron Blaise explains how to draw dynamic characters in Photoshop using traditional thinking.
In this tutorial, Aaron Blaise will explain how he creates realistic characters and how he uses different references in the process.
1. Create a sketch

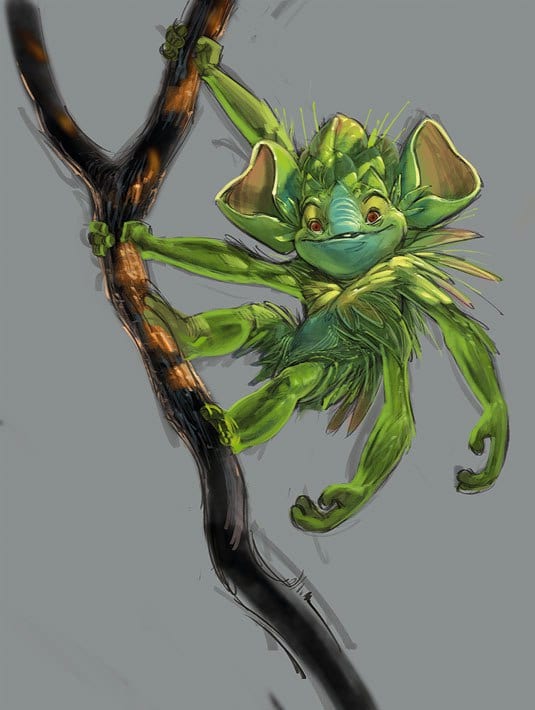
Fill the document with gray, which will allow you to more accurately place light and dark accents. Create a new layer on top of the gray background and name it Rough Sketch. At this stage, we draw freely, without getting hung up on details. We outline the main proportions and features of the character.
2. Detailing the sketch
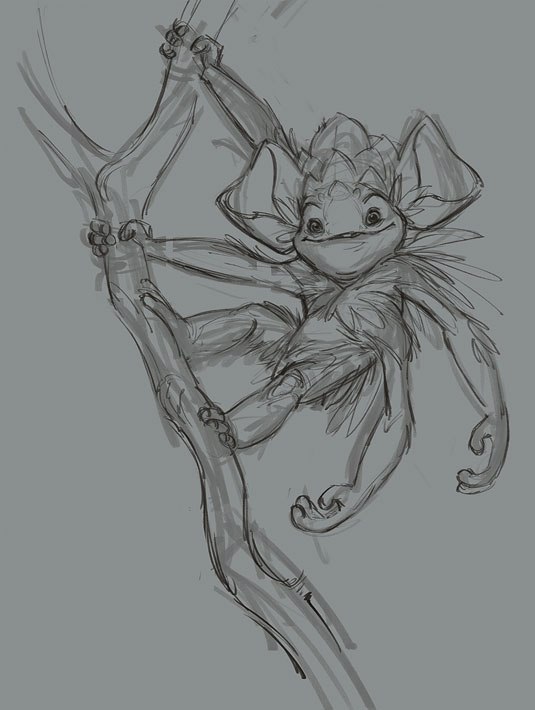
Lower the Opacity of the sketch to about 30% and create a new layer called Improved Sketch. Now we draw details – for example, wrinkles, folds, nose.
This stage is very important, since the resulting sketch will be a sample (template) for the further drawing process.
3. Apply the primary colors
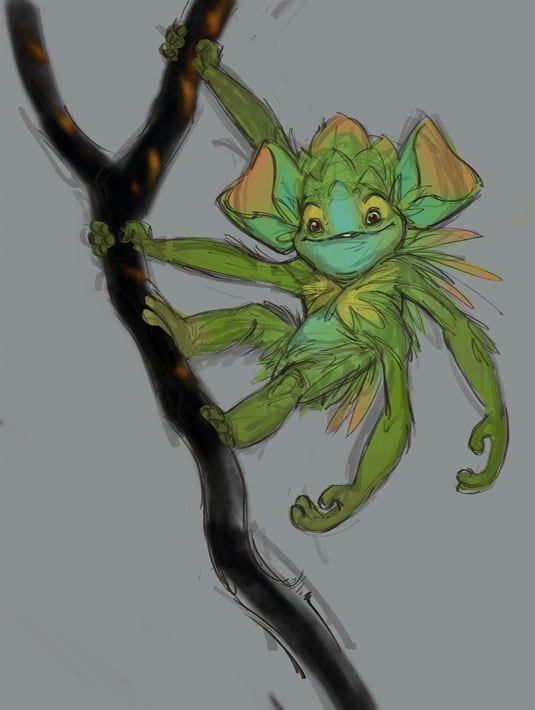
The main color is the one that our character has initially, without affecting him with light or shadow. Create a new layer under the layers with the picture and name it Foreground color. At this stage, the author uses a large size brush that resembles a natural brush. The author starts with green as it is the dominant color. We casually apply green to the character.
Next, add other colors for variety. At this stage, you can also work quickly, clearly and without thinking about the details. Time to experiment! The resulting drawing will be the basis for further coloring.
4. Create the first shadow layer
Create a new layer on top of all the others, call it Shadows. Set the blending mode to Multiply. This will allow the foreground color to be visible through the shadow layer. Begin to paint shadows with the chosen cool medium tone color.
You can also do everything quickly at this stage, but be careful.
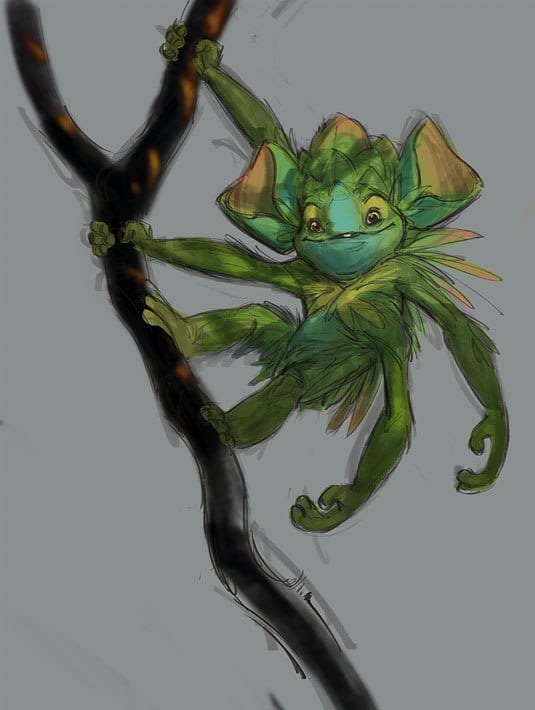
5. Draw direct lighting
Next, create a new layer on top of the others and name it Direct Lighting. It is very important to remember the temperature of the flowers at this stage. I use a cool neutral color for shadows, but warmer and purer colors for highlights.
We begin to paint in the lighter areas, where the light falls on the character. We use warm greens and yellows for this. We see that our character is already starting to take shape!
6. Define the reflected light
Create a new layer under the Direct Lighting layer and name it Reflected Light, then choose a color that is slightly warmer and brighter than the surrounding shadow color.
The key factor here is caution and subtlety: draw neatly.
7. Marking the light flares
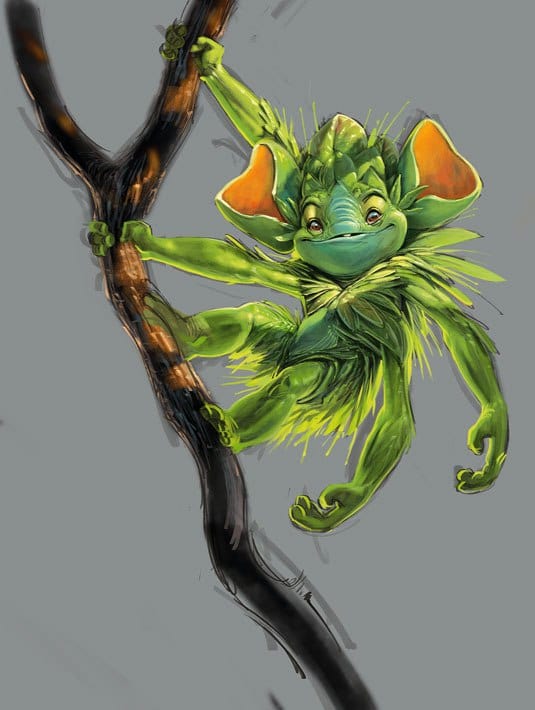
Create a new layer and name it Highlights. Open the Color Picker, choose some light color and significantly increase its brightness. Then we draw the highlights directly where needed. The author also adds a glow around the edges and deeper shadows.
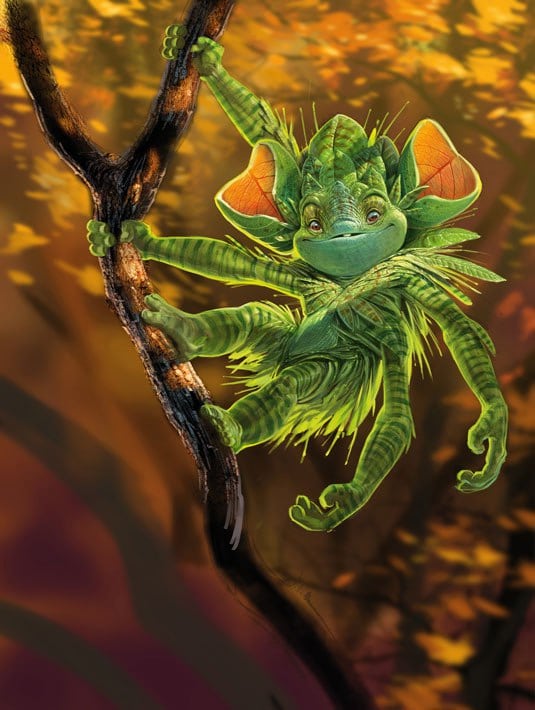
8. Create an autumn background
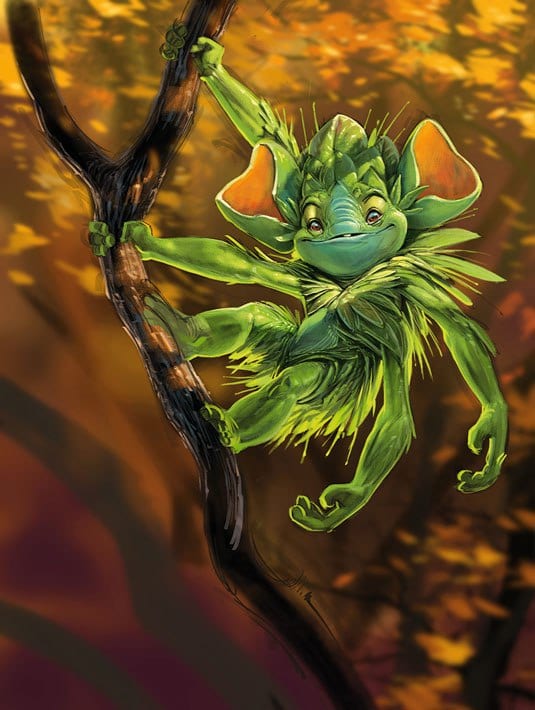
Next, create a new layer below all the other layers and name it Background. Using a natural brush, very quickly start sketching the background with “autumn” colors that contrast favorably with the green character.
Draw the background in darker shades to make the character stand out better. Then press Filter> Blur> Gaussian Blur and set the blur to 25 pixels.
9. Using photo references
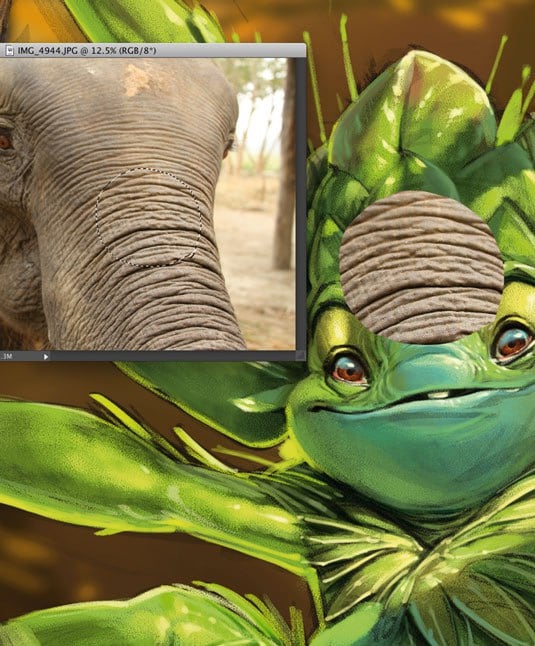
The elephant skin texture will help create cool skin for our character! Select a small section with the Lasso Tool, drag it over to our illustration and lower the Opacity to 30%. Then click Image – Correction – Exposure (Image> Adjustments> Exposure), increase the Gamma value and adjust the Exposure value to increase the contrast. Thus, adjust these settings along with the Opacity level until the texture fits perfectly into our drawing.
10. Set the texture to our character
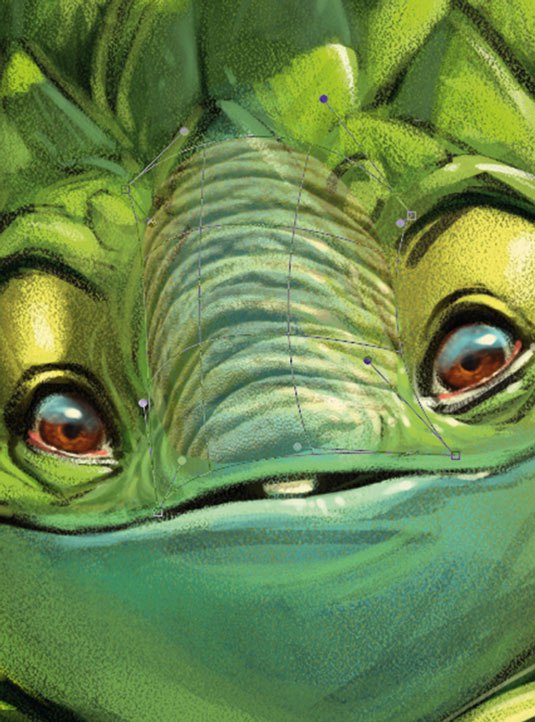
Next, go to Editing – Free Transform (Edit> Free Transform), change the size of the texture and then select Editing – Transform – Curvature (Edit> Transform> Warp). Now we can shape the texture so that it fits in its shape to our character.
And then the author simply repeats steps 8 and 9 to create a mosaic of textures on the character. The author experiments with a variety of textures – here he uses both the skin of an elephant and the surface of plant leaves.
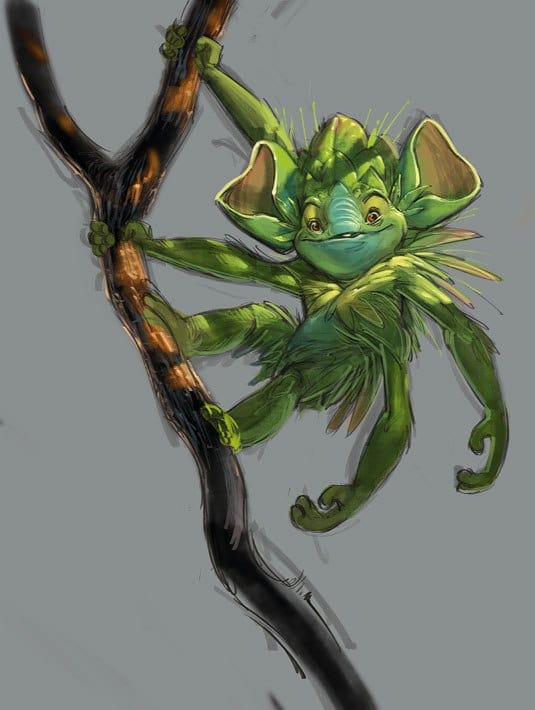
11. Add highlights to textures
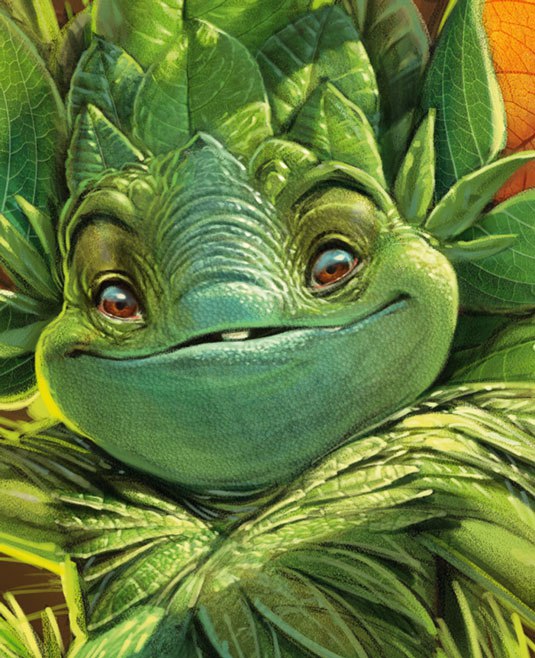
At the end of this stage, the texture should look like a part of the character, that is, it should completely merge with him. Create a new layer on top of all the others and name it Texture Highlights. Then select a nifty thin brush and start painting highlights on top of the textures where the light falls.
12. Draw specks on the character’s skin
Create a layer under the “Highlights on textures” layer and name it “Spots”. Set this layer to Multiply Blending Mode.
Now, using the mid-tones of the greens and reds, carefully begin to draw the spots and stripes on the character’s skin. This will make it more interesting and will also help define the shape of the body.
13. Draw the foreground elements
Create a new layer on top of the others and begin to draw freely the leaves and branches in the foreground. And since all this will be blurry, there is no need to diligently draw all the details. However, the author carefully creates these elements using multiple layers.
When we have drawn everything, merge all the layers and go to Filter – Blur – Gaussian Blur. Set the blur to 35 pixels. This will give the image a pleasant depth.
14. Final touches
Copy all layers with the character and merge them into one layer. Then we make all the original individual layers invisible. Select the Blur tool and the Airbrush setting, set it to about 300px and 50%.
Now we start to blur those areas on the layers with the character that we want to make out of focus. This is done in order to draw the viewer to the main part of the drawing – in this case, to the character’s face. It will also give the drawing a kind of photographic look. Finally, flatten the image and adjust the exposure and saturation to make the drawing look bright and beautiful.
Translation: Inna Sobchuk
Original: creativebloq.com
…

