
How to Draw a Geometric Portrait in Adobe Illustrator
How to Draw a Geometric Portrait in Adobe Illustrator
In this tutorial, we will learn how to create a self-portrait using geometric shapes.
We will use our own photo as a sketch.
We will learn how to work with geometric shapes, handle contours, choose a palette of colors and much more.
purpose

Step 1
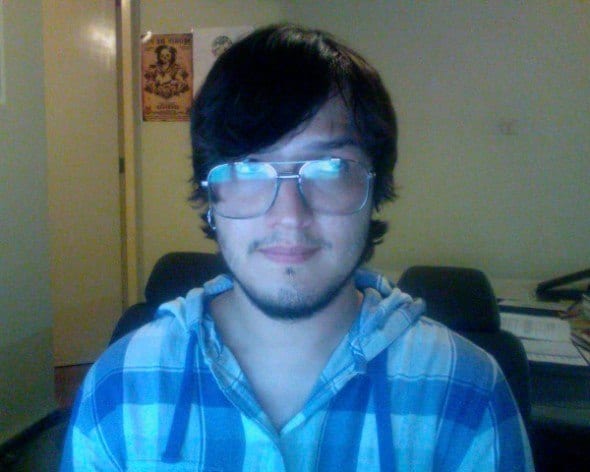
First you need your photo. We will need a photo that shows your face and shoulders, so you can take a photo with your webcam.
Step 2
Create a new document in Adobe Illustrator 600 X 480 px.
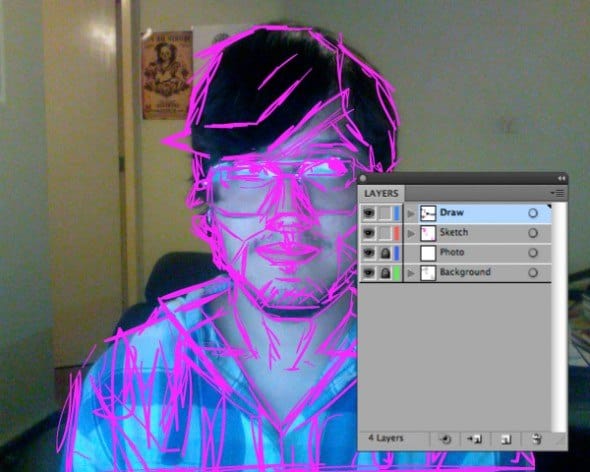
This is how we organize the layers:
- We will name the top layer “Draw” – this is where we will place our illustration.
- Place the “Sketch” layer under the “Draw” layer.
- Place the “Photo” layer below – this is where we will place the photo
- At the very bottom, position the “Background” layer, draw a square in it the same size as the document (600 X 480px) and fill it with gray.

Step 3
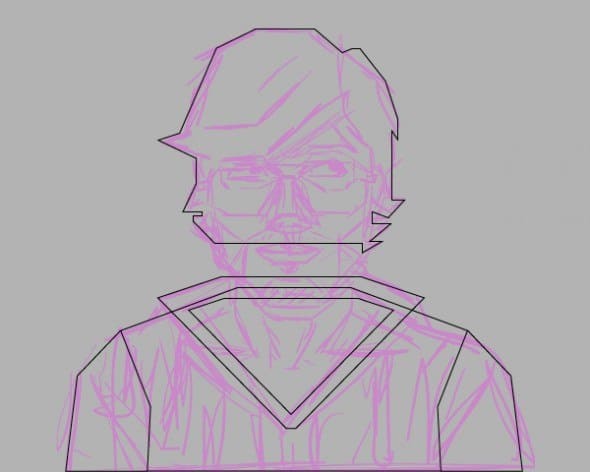
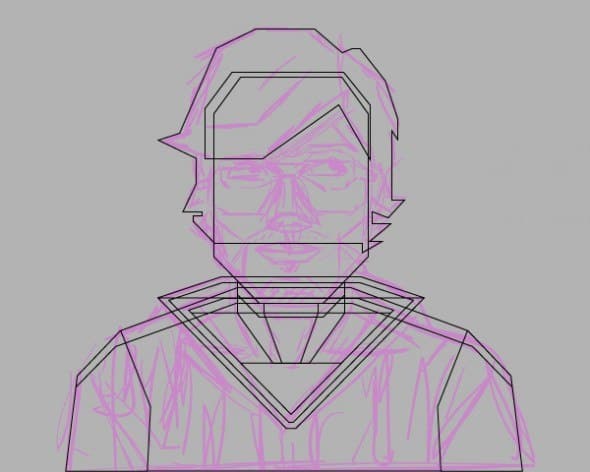
Lock the “Background” layer and the “Photo” layer. On the “Sketch” layer, use the Blob Brush Tool (Shift + B) to draw a sketch using the outlines of the photo. Try to make all the lines straight as we will be drawing a geometric portrait.
Step 4
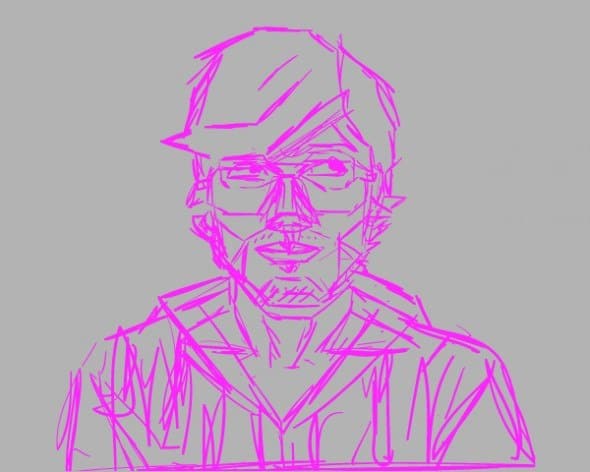
Now you can remove the “Photo” layer. Don’t worry if your sketch doesn’t look very neat, this is just a sketch for our portrait.
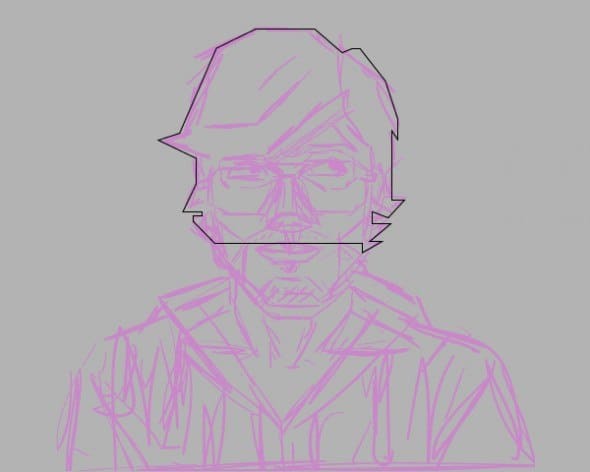
Step 5
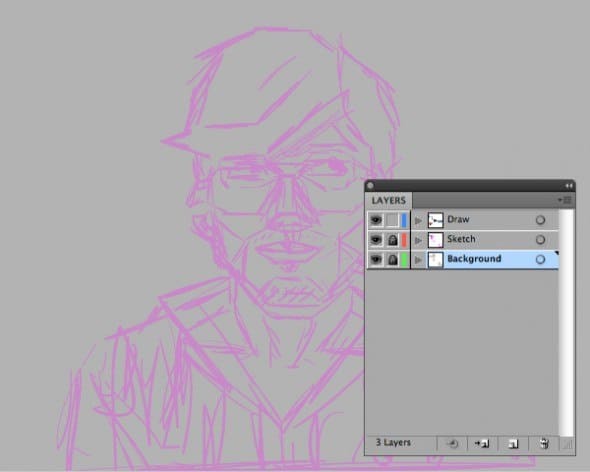
Change the opacity of the sketch layer to 30% and lock it.
Now let’s start drawing shapes using the Pen Tool (P). Using a 1pt black stroke draw the hair using straight lines.
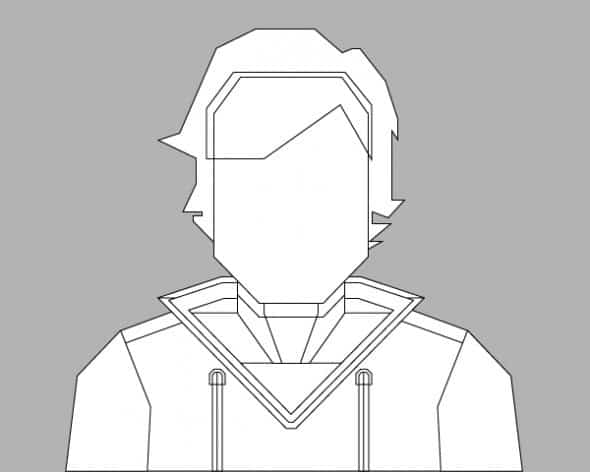
Step 6
Draw half of the T-shirt, Duplicate it (Ctrl + C / Cmnd + C) and Paste on Top (Ctrl + F / Cmnd + F).
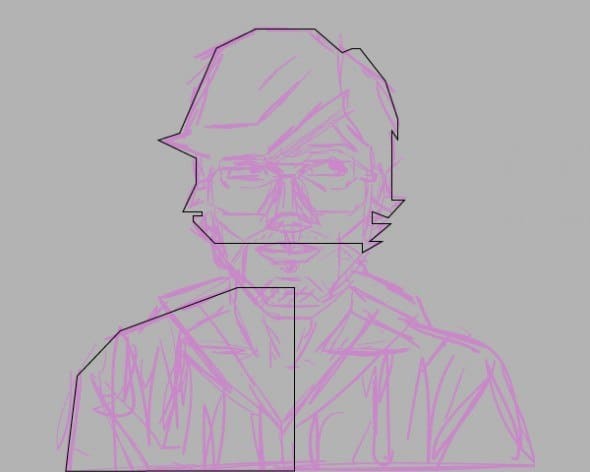
Flip the copy horizontally using the Reflect Tool (O).
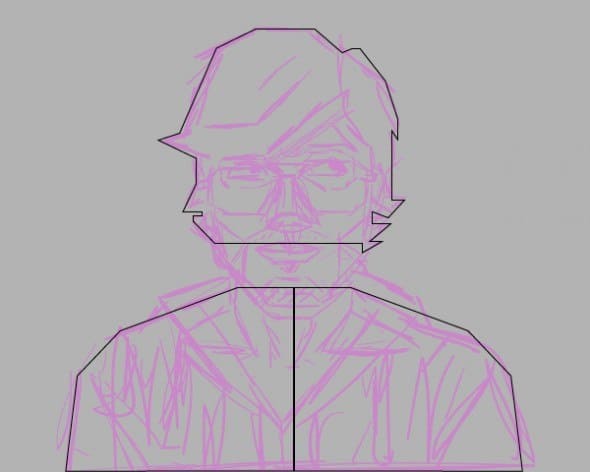
Select the two paths, then go to Pathfinder> Unite option. Almost all of the elements in this illustration will be created in the same way: copy, flip, and merge.
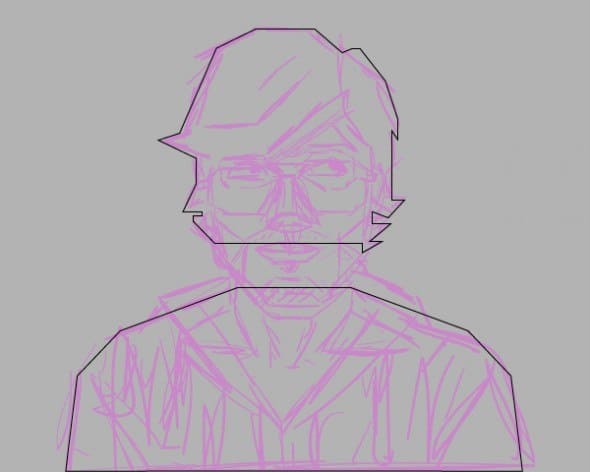
Step 7
Now draw the neck using the Polygon Tool.
Draw an octagon first and leave only the top half.
Use the Scale Tool (S) to reshape a little.
Decrease the distance between the dots at the bottom of the shape.
Copy the shape and paste the copy on top, resizing it slightly.
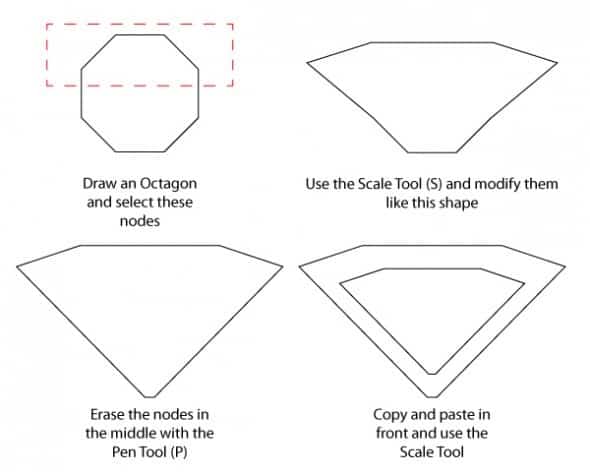
Place the shape in the right place.
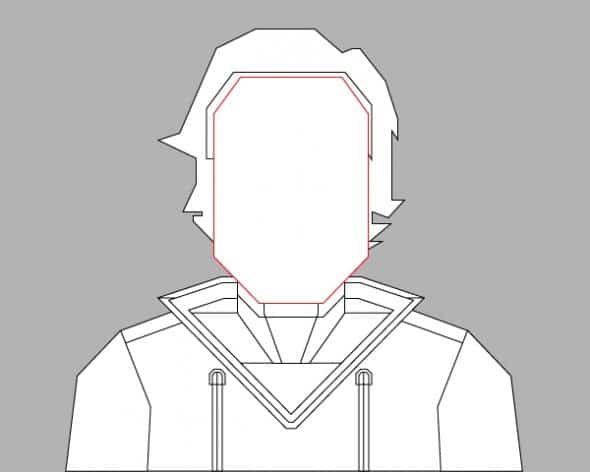
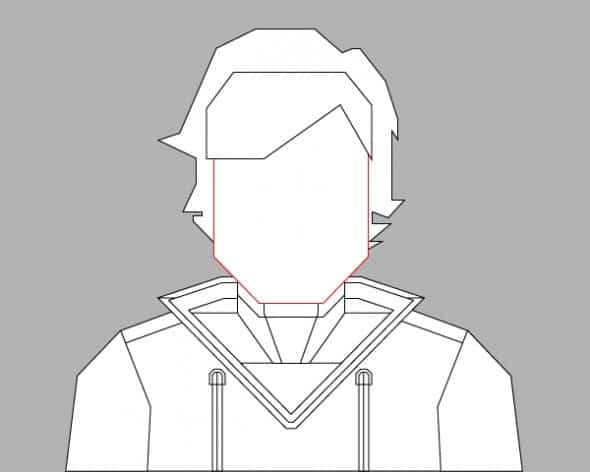
Step 8
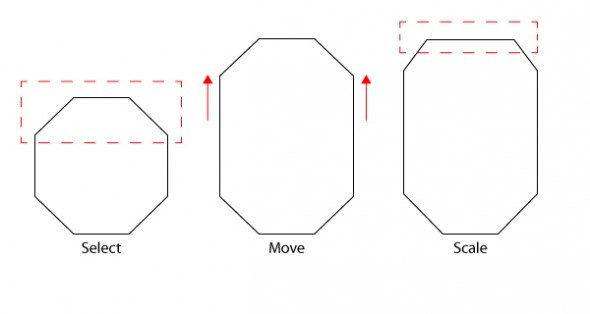
In a similar way, we will draw the shape for the head. Draw an octagon and select only the top part. Move the paths and reshape a little with the Scale Tool (S).
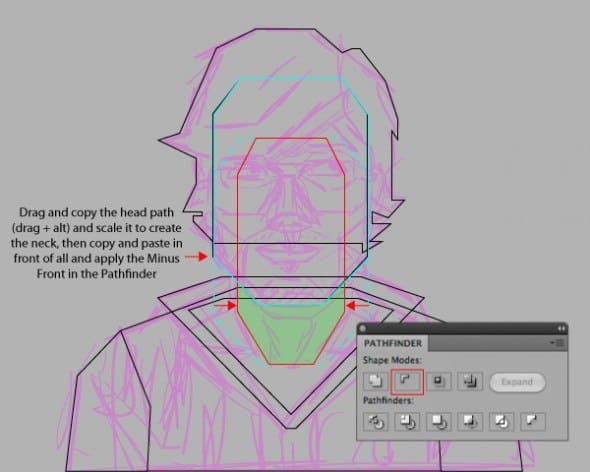
Duplicate the shape for the head, resize it and position the copy as shown in the image below (to make the shape for the neck). Then go to Pathfinder> Minus Front.
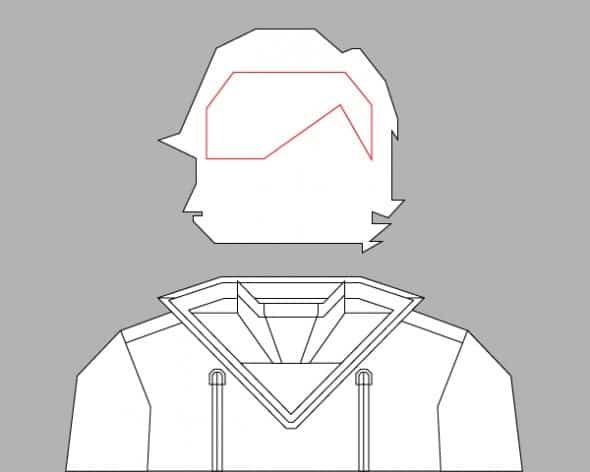
Step 9
To create parts you can use already created shapes. For example, to create details for the neck, you can duplicate and reshape the face. Then duplicate the base shape of the neck and go to Pathfinder> Intersect.

Step 10
Add more details to our illustration using the Pen Tool (P) and shape tools. Don’t forget to reshape with Pathfinder.
Step 11
Press D to make your illustration look like the screenshot below. Reposition the shapes as needed.
Step 12
Now let’s add other details of the face: eyes, nose and mouth.

We will use a hexagon to draw the lips. Modify it with the Scale Tool. Then draw a rectangle and position it in the middle. Go to Pathfinder> Minus Front. Copy the shape and paste it on top, modify it a little to create the upper lip. Change the paths at the top with the Direct Selection Tool (A).

Step 13
We’ll start the shape for the eyes by creating an octagon and the Eraser Tool (Shift + E) (to erase the bottom of the shape). Copy our shape and move it down a bit. Duplicate the main shape and hit Minus Front in the Pathfinder panel. This will be the shadow for the eye. Duplicate it again to create lashes. To add more detail, draw a small octagon on the iris and create the lower eyelid. Since the eyes point in the same direction, we can duplicate just duplicate one eye.

Step 14
We’ll start creating the nose by creating an octagon. Modify the shape a bit and add some dots. Then add some octagons and some simple shapes. Do not forget to handle the contours and observe symmetry.

Step 15
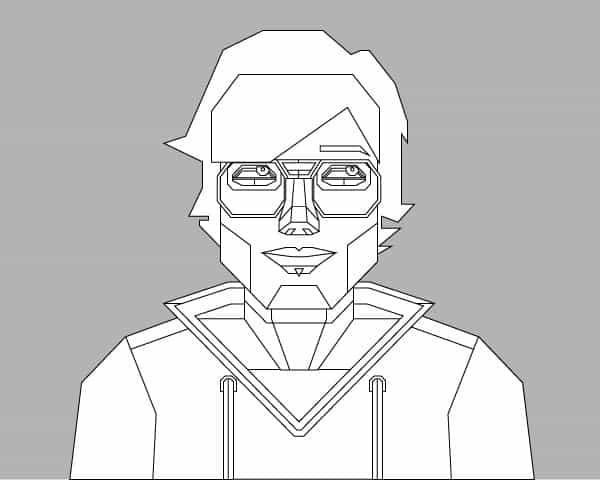
The glasses are pretty simple to create: draw a rectangle, modify it a bit, create a copy of the shape and resize it. Duplicate the shape for one glass and add small details.

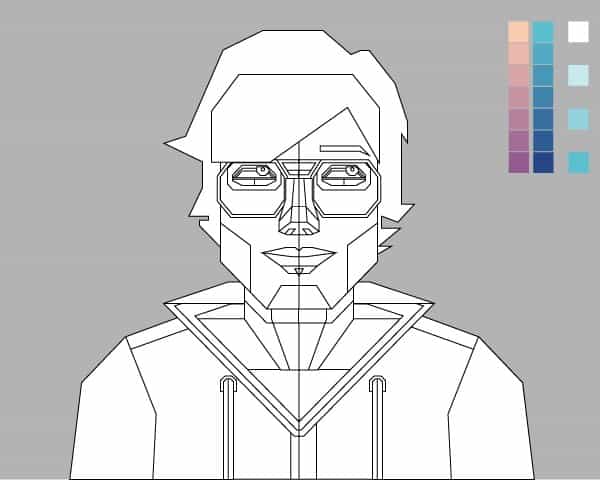
Our illustration now looks like this.
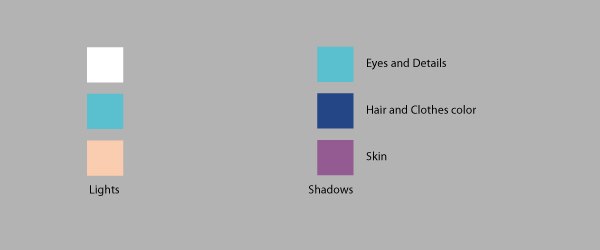
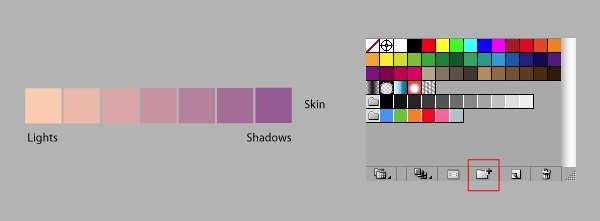
Step 16
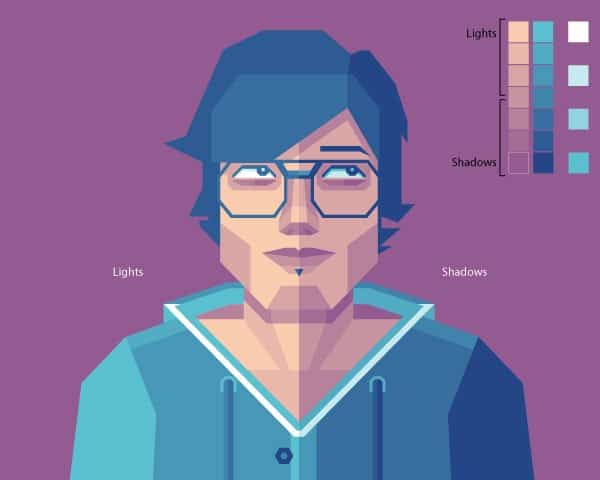
Now we need to select a color picker. Choose colors for highlights and shadows. Draw rectangles and fill them with your chosen colors.
Step 17
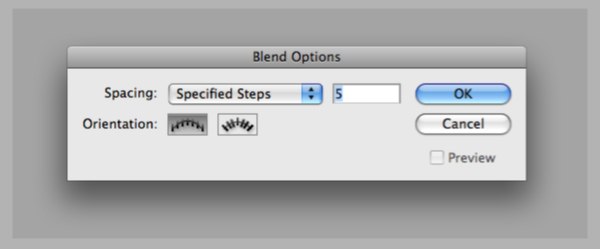
Use the Blend Tool (W) to blend from light to dark for the skin.

Go to Object> Blend> Blend Options and change the settings for the Specified Steps. Change the value to “5” and click “OK”.
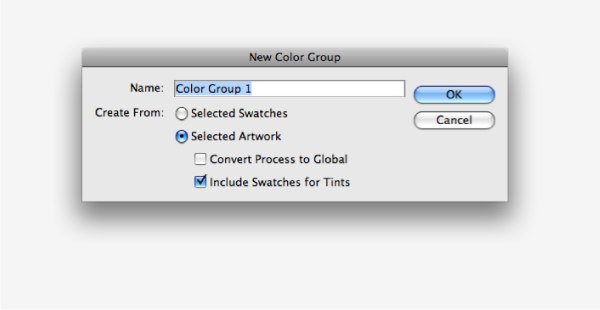
Step 18
Then go to Object> Expand. You can save the colors in the swatch panel and add them to a new folder.
Give the group a name and save it.
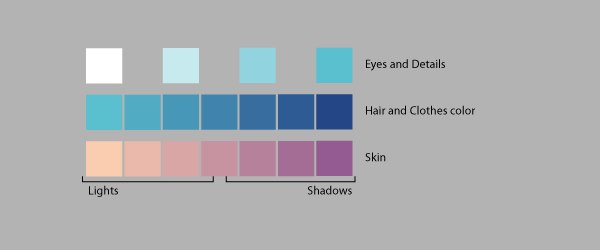
Here’s our color picker, for the eyes and details change the Specified Steps to 2 (instead of 5).
Step 19
Draw a line in the center of the illustration. Select the hair layer and lock it. Then select the line and go to Object> Path> Divide Objects Below. This way we will cut all the paths that are under the line.
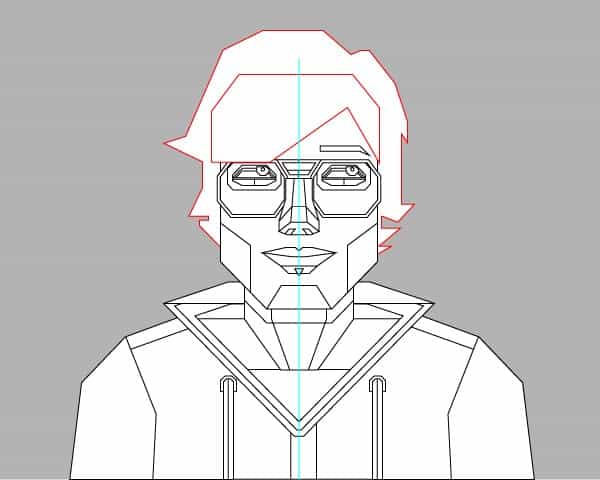
Now we can unlock the hair layer.

Step 20
You can add colors using the Eyedropper Tool (I). Click to select a color and hold Alt to add a color.
Note that one side of the face is lighter than the other. Try to play with colors and shades.
Step 21
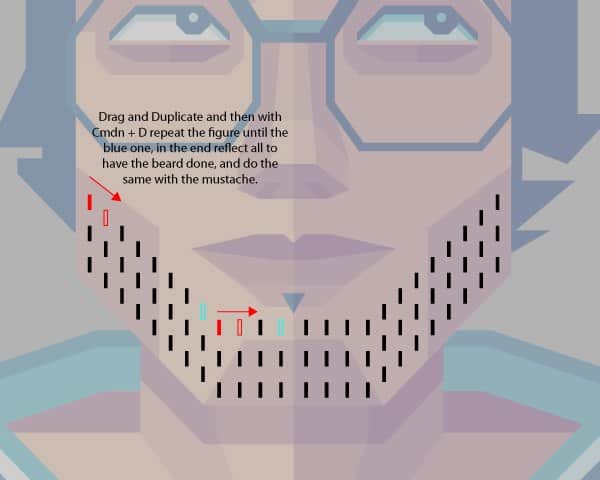
To create the beard, draw a small rectangle with the Rectangle Tool (M). Copy the rectangles until you get the desired result.
Step 22
You can add some small details.

Result

Source: iam.designer
…

