
This is Photoshop! – 5 simple tricks to help a designer
This is Photoshop! – 5 simple tricks to help a designer
We continue to analyze useful and not so useful tricks in Photoshop that can simplify the work of designers and artists.
We have elicited a new portion of usefulness from the designers of the studio and today we will tell you about 5 tricks in Photoshop that you might not know.
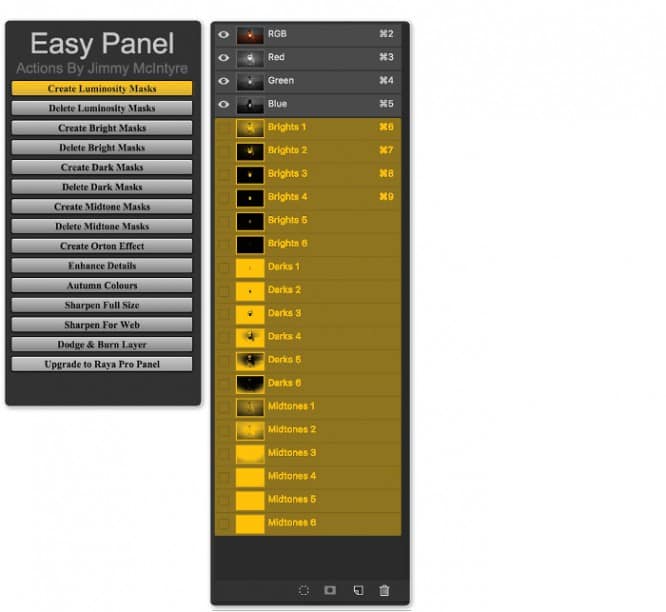
№1 – Luminosity masks

Light masks are one of the post-correction methods for images, the essence of which is to frequency decompose light data in channels and use them as masks in adjustment layers. It is a powerful, non-destructive image correction technique that allows you to separately manipulate highlights, shadows, and midtones. We’ve found some YouTube tutorials to help you figure out how it works.
https://www.youtube.com/watch?v=ga17QmP-TTY
https://www.youtube.com/watch?v=j_Xm4rZYhqo&t=7s
https://www.youtube.com/watch?v=kH_MgJs9zHI
Masks can be created manually, or you can download the Easy Panel plugin for decomposition automatically. The plugin can also sharpen and sharpen images.
The plugin can be downloaded on the official website of the developer
# 2 – Color Lookup and Creation of LUTs
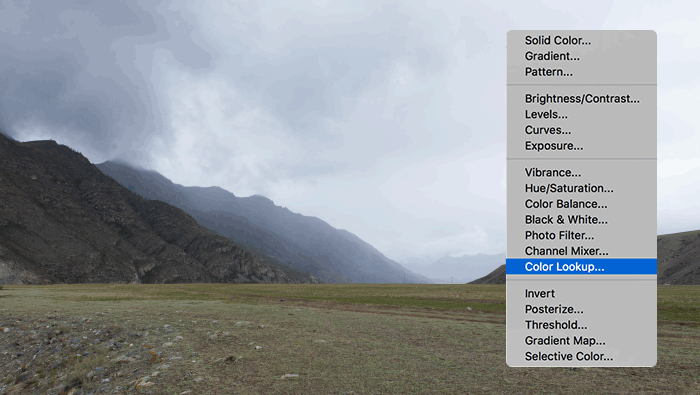
Usually LUTs are used to convert videos from different sources into one format and color correction of footage in video production. For those wishing to get into the basics of cinematic color grading, we recommend a two-hour stream with Rodion Zhabrev. To begin with, it is enough to understand that loot is some kind of presets that allow you to substitute one color value for another, creating the necessary artistic expression for your scene.
In Photoshop, starting with the CC version, there was a tool Color Lookupallowing you to apply loot to images.
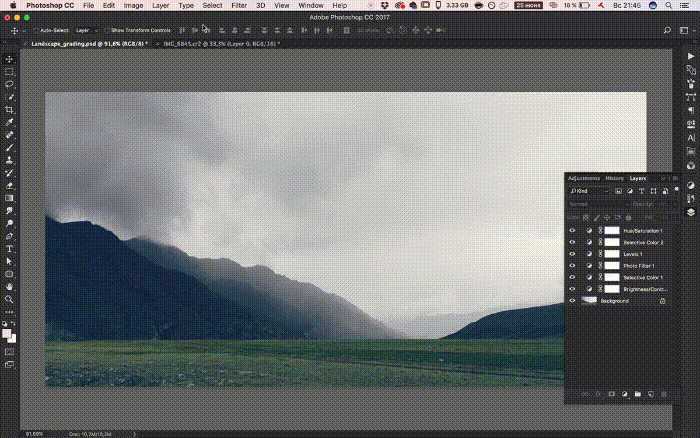
LUT creation
So, we have created 238 adjustment layers, now we need to pack all this miracle into loot.
Let’s go – File / Export / Color Lookup Tables … Leave the default settings, specify the path and save the LUT.
Using LUT
To use the LUT we need an adjustment layer. Color Lookup …, select in the menu Load 3D LUT … and load our saved loot with the extension .CUBE
In this way, you can optimize the color correction process for a series of images.
# 3 – Clipping with channels

With the help of channels, you can easily cut objects. To do this, duplicate the most contrasting channel. Levels can further increase the contrast – Cmd (macos) or Ctrl (win) + L. Next, create a selection and make a mask out of it. The mask can be edited if necessary. The method is especially good when working with hair, plants and other complex shapes, which are unrealistic to etch with a pentule. Don’t forget about layer> Matting> Deffringe … for edge processing.
For more precise masking when working with channels, use the tool Dodge & Burn, painting over dark and light areas of the image.
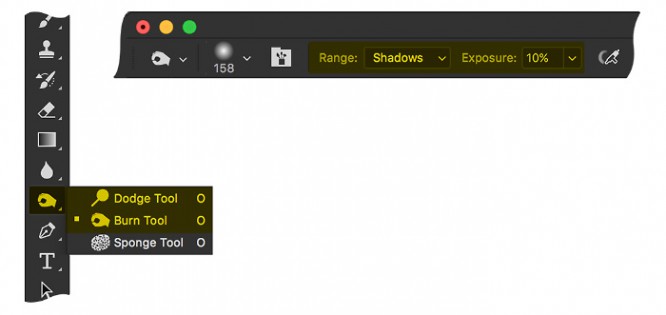
For dark areas – Burn Tool, select in the top menu Shadow
For bright areas – Dodge Tool, select in the top menu Highlights or Midtones
But miracles do not happen and this method is unlikely to help cut hair from a light image and put it on a dark background, here you will have to finish painting by hand.
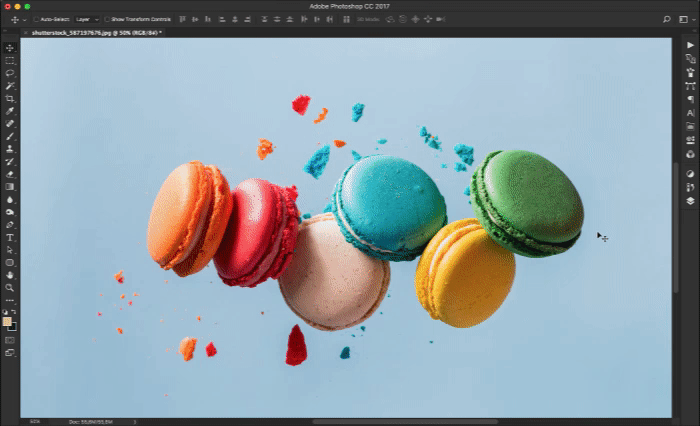
# 4 – Selective color correction
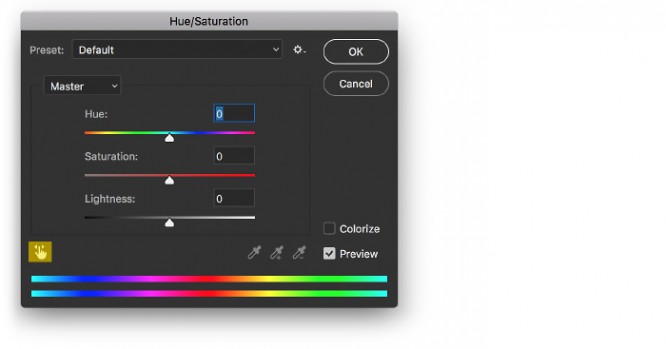
For example, we need to change the color of the red macaroni. To do this, select an adjustment layer. Hue / Saturation …, choose red from the list and try to change the color.
As you can see, color changes affect the whole picture, not just the red macaroni. red is also present in other objects.
To clarify the color range, there is an excellent tool that “cuts” unnecessary color frequencies.
To activate it:
– click on the arrow finger icon, you will have an eyedropper
– click on the color of the object you want to change
Next, we need to “cut” unnecessary color frequencies. To do this, use the sliders, moving them until you achieve the desired result.
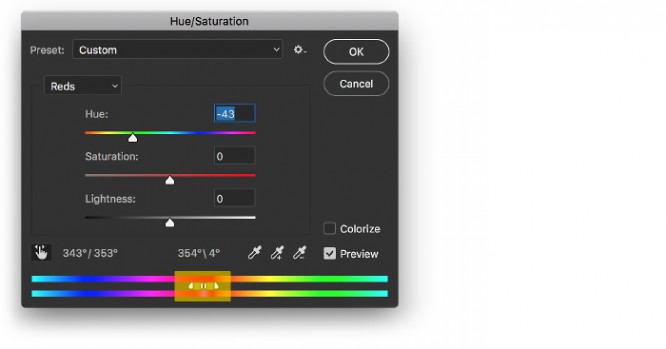
Now you can only change the color and saturation of the red macaroni.
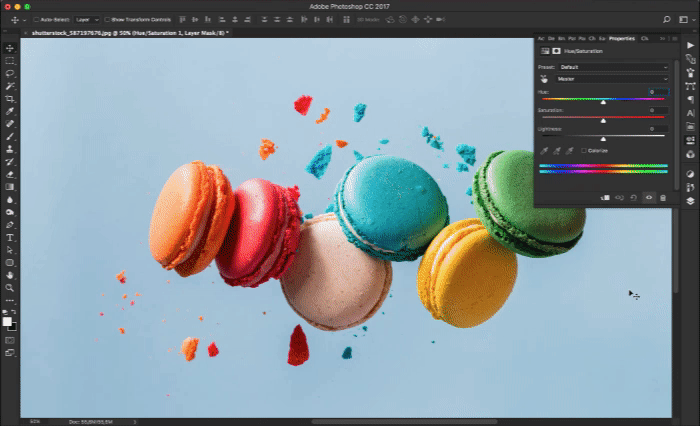
Come on, give it a try, it will take 30 seconds 🙂 Here is a picture to try.
# 5 – Lens Flare
Photoshop has a filter for generating highlights. It’s very simple – create on top of the image new layer and fill it with black.
– Further Filter> Render> LensFlare …
– Twisted the sliders, chose a suitable lens flare, pressed OK
– Apply the resulting layer through Screen
Bonus track
In the same tab Render there are some more interesting tools. For example a generator who would have thought of trees.
Go to Filter> Render> Tree …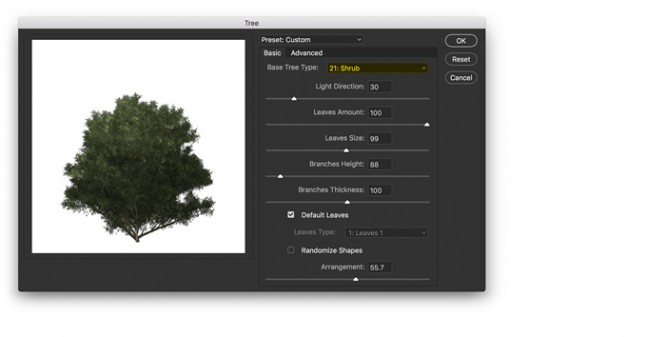
You can choose the types of vegetation, change the number of leaves, their size, lighting, and a lot more. It will help with creating sketches and for working out the background and middle ground in mattes.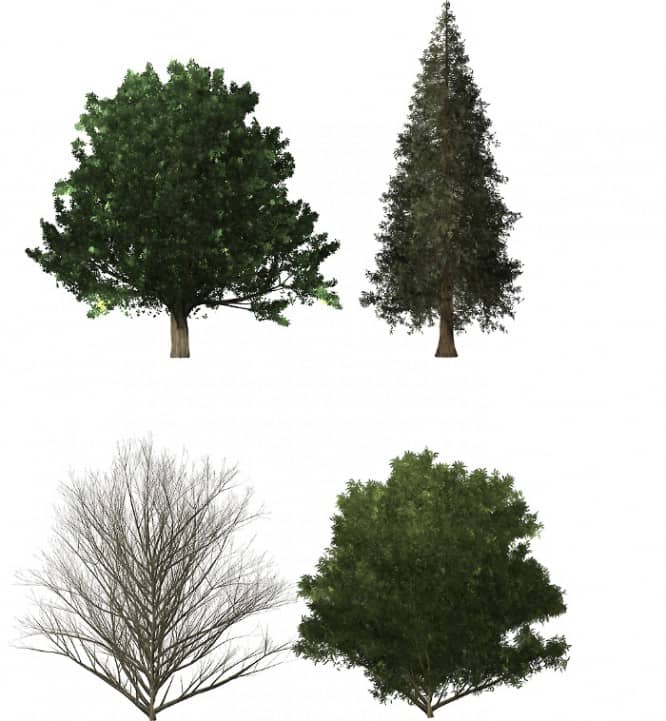
There are still a few splashes in there:
Flame – fire generator. Works only on parameter Shape to PenTool
Lighting Effects – generator of light sources
Picture frame – generator of frames for photos, trash of course
Clouds and Difference Clouds – cloud generator
Fibers – fiber generator
Source: feelfactory.pro
…

