
Lesson: Photo Editing in 5 Minutes
Lesson: Photo Editing in 5 Minutes
This tutorial was written by professional photo stocker Oksana (golosita) and published on her blog on LiveJournal.
The lesson gives basic ideas for novice retouchers and photo stockers about the required minimum photo processing.
Today we have prepared a very simple and necessary lesson for you: photo editing in 5 minutes.
Yes, not a simple treatment, but in a high key, which the drains love so much. Despite the fact that there are a lot of such photos on stocks, they continue to be actively bought.
So let’s go.
Final image after processing

We will learn from the example of basil, fragrant and green. The composition was shot with my favorite lighting scheme – back-side lighting and naturally in RAW format.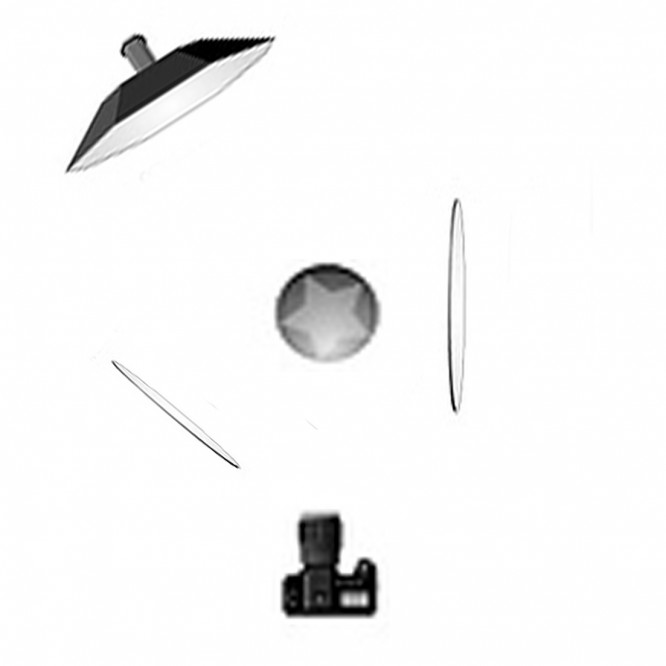
Open the picture in camera raw:
The first thing we need to do is set the white balance. To do this, use the eyedropper, activate it and click on the light or gray area. As a rule, this method gives the most accurate result.
Then we will remove the overexposures, if they are, of course. You need to activate the triangle marked with a 2 in the picture. If there are overexposures, the editor will paint these areas in the photo in red. There are no overexposures in my photo, but if there were, you can remove them with the HIGHLIGHTS slider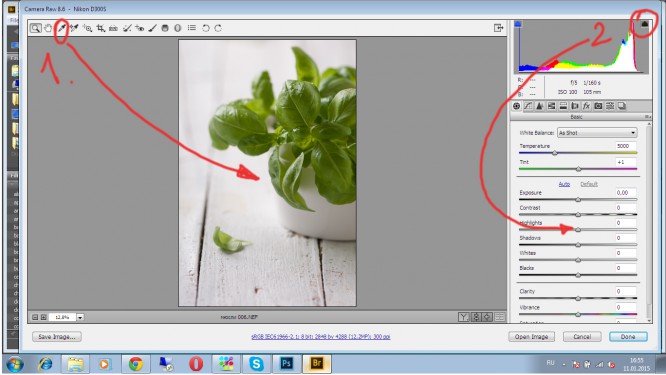
Then increase the exposure quite a bit, add some contrast and white. Make sure that overexposures do not appear again.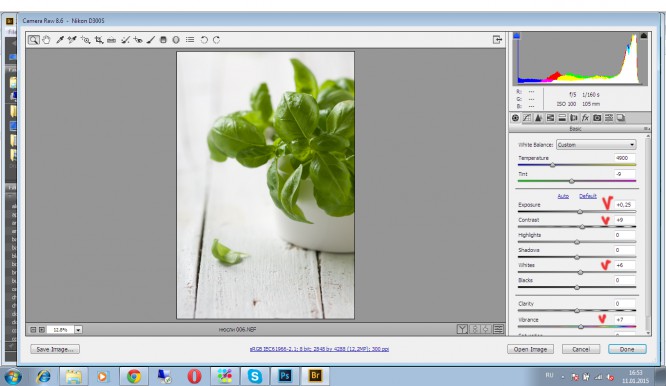
After that, I go to the 3rd tab, where I set the LUMINANCE value to 15. This action will help us get rid of noise, if there are any, of course.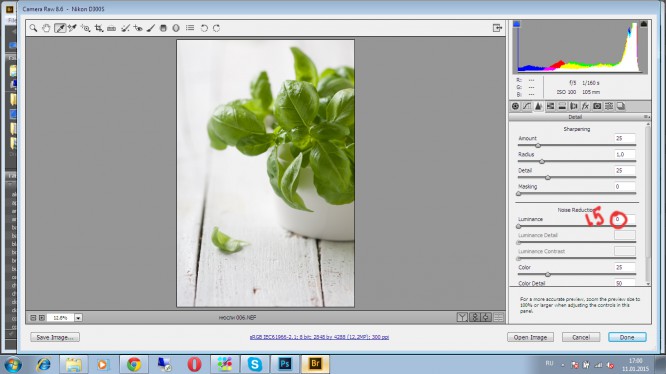
The last thing I do in camera raw is a little color correction in the 4th tab. Please note that the sliders in the HUE tab are used to change the color and are not suitable for adjusting food photos.
After that, open the photo in the Photoshop editor.
The first thing we do is sharpen it a little. Press ctrl + J (hotkey to copy the layer) and go to UNSHARP MASK. Each photo has its own settings, here Amount -20, radius – 2. After that select our layers and press ctrl + E to merge them.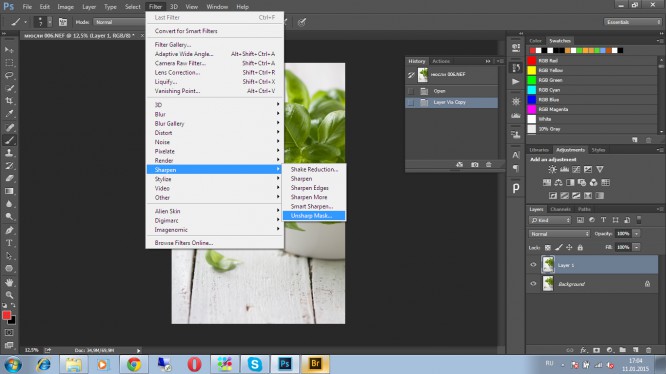
Then, using a curves adjustment layer, make our photo lighter and brighter. Don’t be afraid to twist the curves, it can often save even the darkest photos.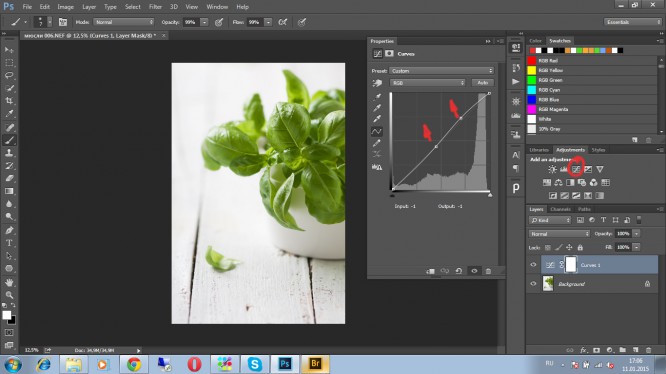
Create another curves adjustment layer and drag the left slider all the way to the right, if color areas appear, we overdo it with curves and light up the photo. If there are no such areas, remove the adjustment layer and move on. We are great!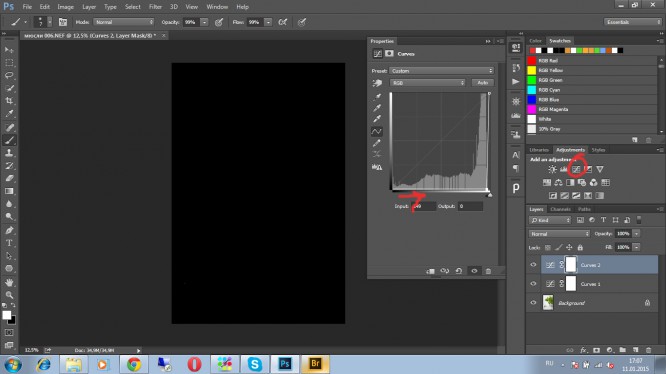
And then add our basil green in a selective colors adjustment layer. Artists remember that beautiful green owes everything to yellow, so choose yellow and slightly adjust its settings.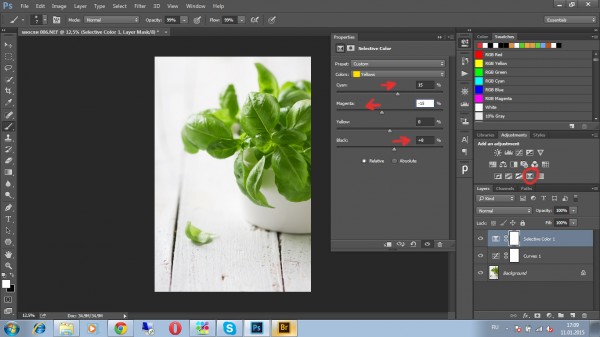
After that, the last stage remains: select all the layers, combine them with the already familiar ctrl + E keys and go to clean the photo.
For cleaning, make a copy of the ctrl + J layer and enlarge the photo by 100% (ctrl + 1), check every millimeter and if there is dirt, stains or anything else criminal, remove it with a stamp or whatever you like. Merge layers, save the photo and successfully sell it on stocks!
I will add that it is very important to learn the hard keys for quick work. Find the list online and hang it over your desk. Before performing any action, find it in the list and use it. It will take you very little time.
I wish you all great photos and great mood. Stay with us!
…

