
Create a fast food illustration in Adobe Illustrator
Create a fast food illustration in Adobe Illustrator
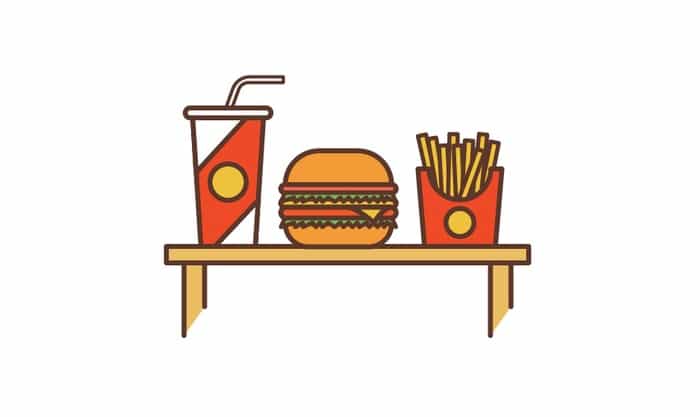
In this tutorial, we will draw a fast food illustration in Adobe Illustrator.
We’ll use basic shapes, live corner functions, and contour manipulation. As a result, we will get a flat illustration, which we will add volume using highlights and shadows.
The lesson is suitable for novice users of the program.
1. Create a new document
Press Cmd / Ctrl + N to create a new document. Select Pixels as Units and set the document size to 800 x 600px. In Advanced Options, set the Color Mode to RGB and Resolution to 72ppi.
In Preferences (Cmd / Ctrl + K) specify 1px for the Keyboard Increment option. Click OK.
From the menu, choose Window> Info to see a preview of your document. Remember to specify pixels as the units by choosing Edit> Preferences> Units from the menu. This will help you work faster.

2. Draw a table
Let’s start by creating the surface of the table and the legs.
Step 1
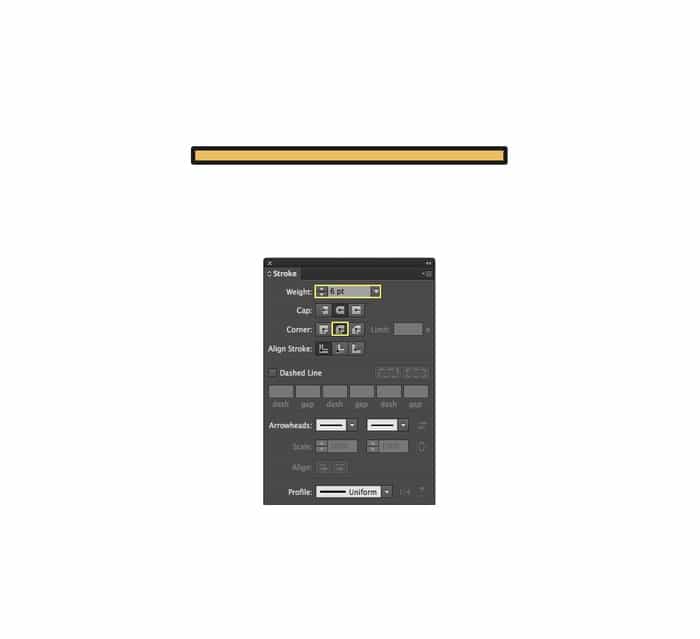
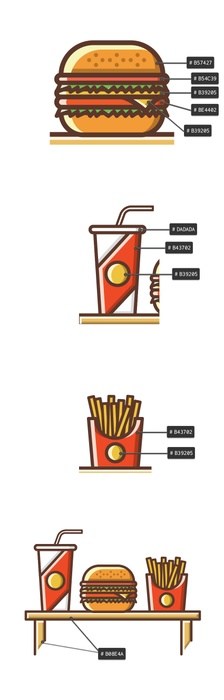
For the table top, draw a 440 x 20px rectangle with the rectangle tool. Set the fill color: # EBBD63 and a 6px stroke weight. In palette Stroke / Stroke select round corners (Round Join).
Step 2
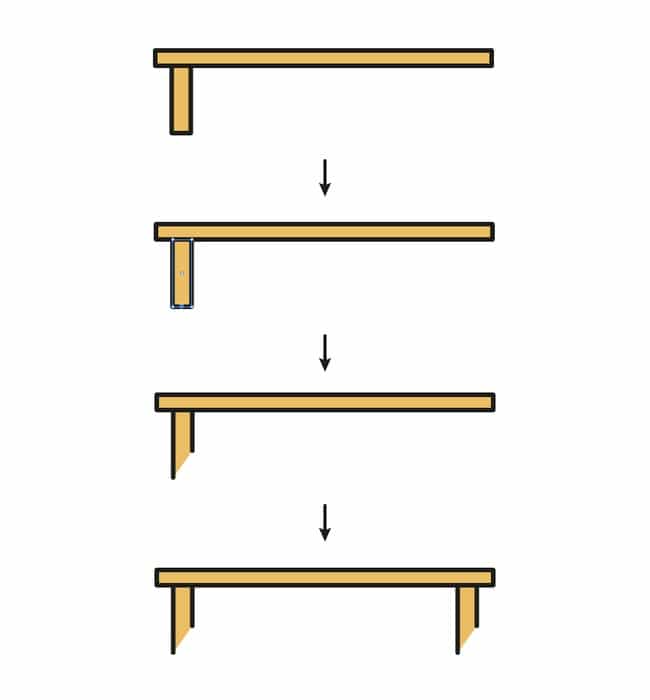
To create the legs, draw a 25 x 88px rectangle (color: # EBBD63), also with a 6px stroke. Use the Pen Tool (P) to add a point on the bottom line of the shape. Using the Direct Selection Tool (A), select and delete the point.
Move the lower right point of the leg up using the same Direct Selection Tool. Duplicate the leg (Cmd / Ctrl + C> Cmd / Ctrl + F) and place it on the opposite side of the table.
3. Draw a drink
Step 1
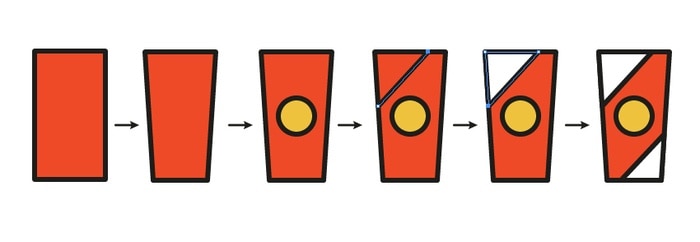
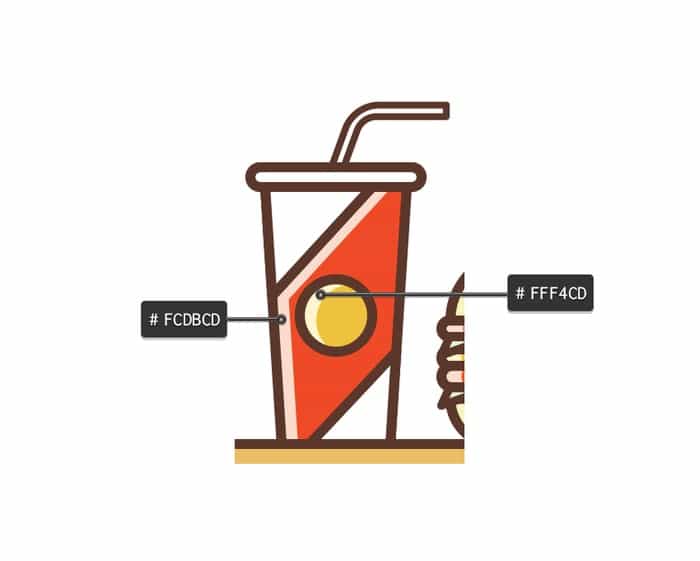
Draw an 86 x 156px rectangle (color: # F04903). Using the Direct Selection Tool (A), select the two bottom points and move them closer to the center of the shape (alternately) by 10px.
Draw a 44 x 44px circle using the Ellipse Tool (Color: # EFC206) in the center of the glass. Using the Pen Tool (P), draw two white triangles as shown below.
Step 2
We draw a lid for a glass. Using the Rounded Rectangle Tool, draw a 104 x 12px white shape. Give the Corner Radius 6px and the Stroke Weight 4px.
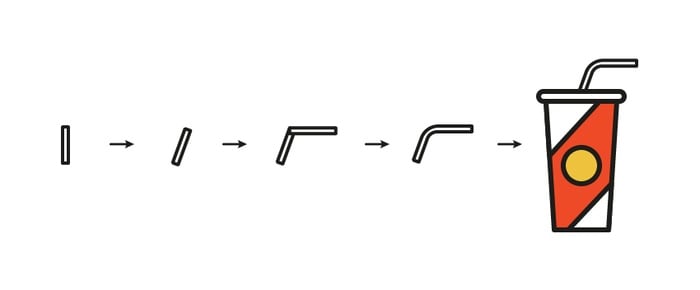
We draw a straw. Draw a 7 x 44px white rectangle and rotate it 340º in the Transform panel. Draw another 56 x 7px rectangle, also white, position as shown below. Select both rectangles and click on the Unite icon in the Pathfinder palette. Now select the two corners on the fold with the Direct Selection Tool (A) and gently drag on the Live Corners to round them. Place the straw in its place and send to back: Right Click> Arrange> Send to Back / Arrange> Send to Back.
Group everything together (Cmd / Ctrl + G).
4. Draw a hamburger
Step 1
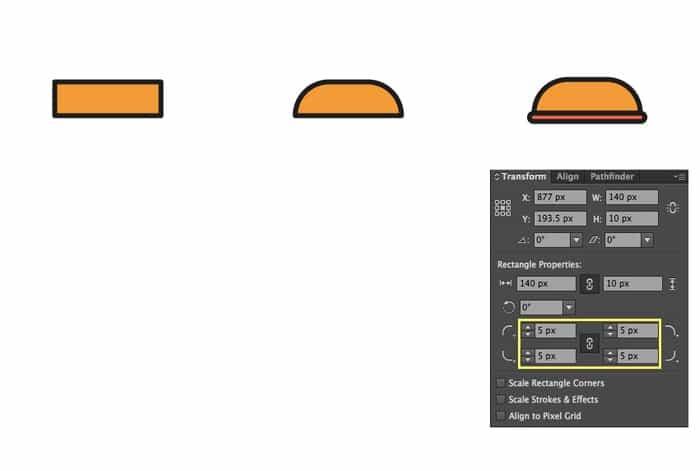
Let’s start with the bun. Draw a 129 x 41px rectangle (color: # F29B34) and round the top corners using the Direct Selection Tool (A) and the Live Corners function.
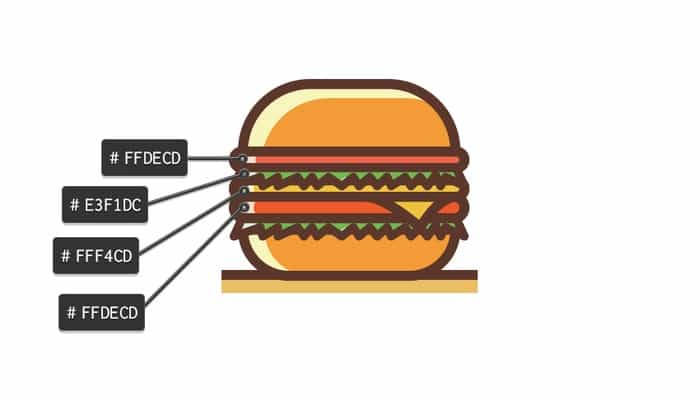
Draw a slice of ham from a 140 x 10px rectangle (color: # F16554C) with 5px rounded corners (rounded using the Transform palette).
Step 2
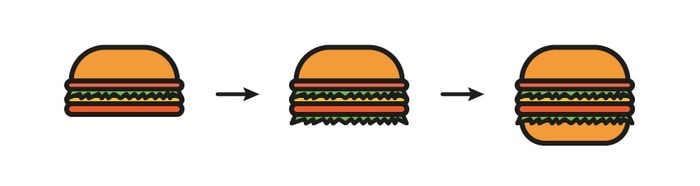
Draw a leaf of lettuce with the Pen tool as shown below. The stroke is 6 px thick and the fill color is # 71BA51.
Draw a slice of cheese with the Rounded Rectangle Tool (140 x 10px color: # EFC206), 5px radius. Sending cheese to the background.

Step 3
Add the meat using a 140 x 13px rounded rectangle (color # FD5B03). The corner radius is 7px. Duplicate the lettuce leaf and place it under the meat.
Finally add the bottom of the bun by drawing a 129 x 28px rectangle (color: # F29B34) and rounded the bottom corners. Group everything together.
5. Draw French fries
Step 1
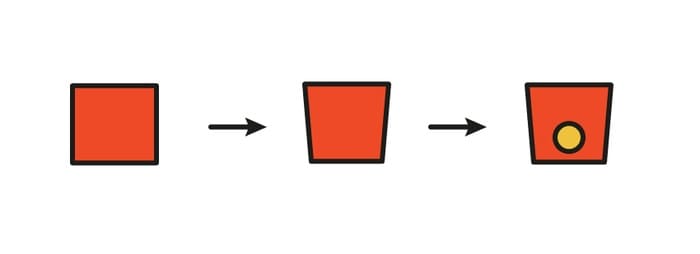
Let’s start with the package. Draw a 102 x 94px rectangle (color # F04903) and use the Direct Selection Tool (A) to move the bottom corners closer to the center by 8px each.
Then draw a circle with the Ellipse Tool (# EFC206) and place it in the center of the bag.
Step 2
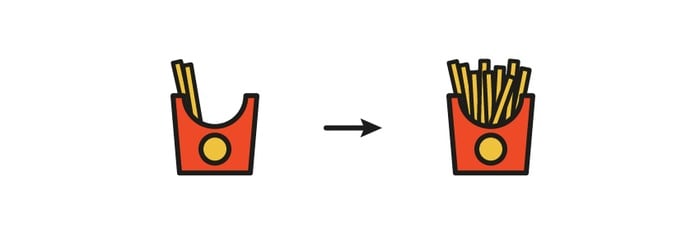
Draw a 75 x 75px circle and place it as shown below. Select the package and the circle and click on the Minus Front icon in the Pathfinder palette.

Step 3
Draw a 10 x 120px rectangle (# EFC206) and set the stroke size to 5px. Make copies (Cmd + C> Cmd + F), and rotate them with the Rotate tool ®positioning as shown below. Select all the rectangles and send them to back.
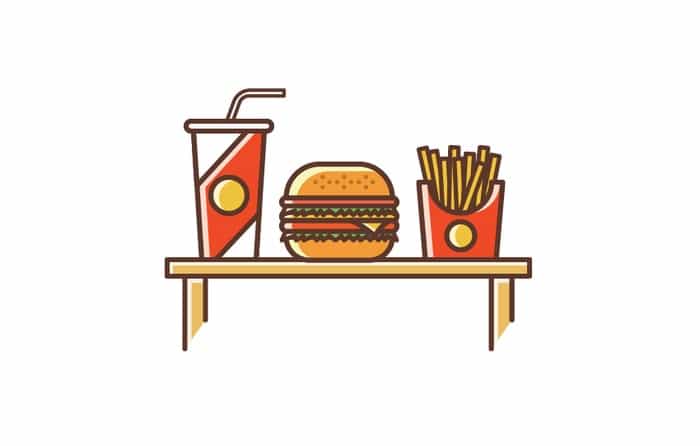
Step 4
Place all elements on the table:

6. Light and shadow
Let’s add some volume to our objects.
Step 1
First, let’s change the color of the whole work a little. Select everything and change the stroke color to # 5B372B. Then go to Object> Expand Appearance.
Ungroup the object into. Select them all and press Shift + Cmd (Ctrl) + G. This will make it easier to work on the details.
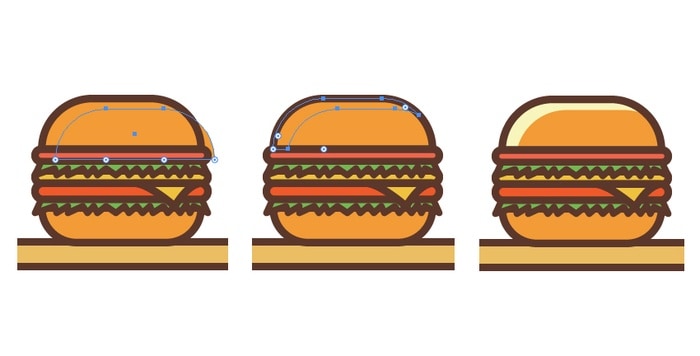
Step 2
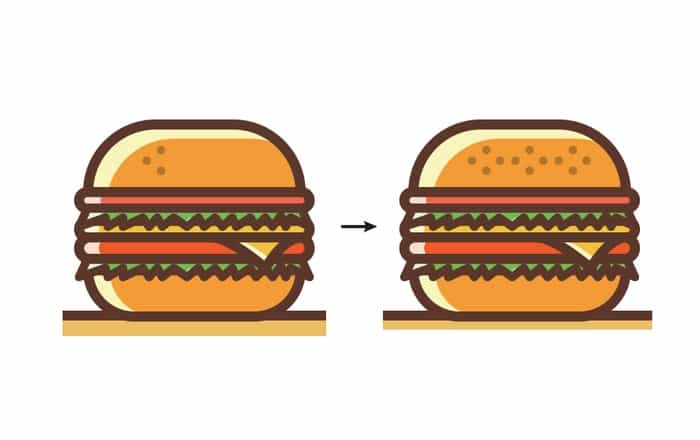
Let’s start with a hamburger. Select the top of the bread and duplicate it twice (Cmd + C> Cmd + F). Move the second copy lower and slightly to the right. Select both copies and click on the Minus Front icon in the Pathfinder panel. Give the resulting shape the color # F8F5BC. Repeat the process for all objects.
Step 3
In the same way, add highlights to the glass with the drink.
Step 4
Decorate the burger with small 5x5px circles (color: B57427).
Step 5
Add highlights to the package with fries.

Step 6
Finally, add highlights of # FBF2E0 color to the table and legs.
Step 8
Add a shadow to all objects in the same way, just do it on the other side.
7. Finishing details
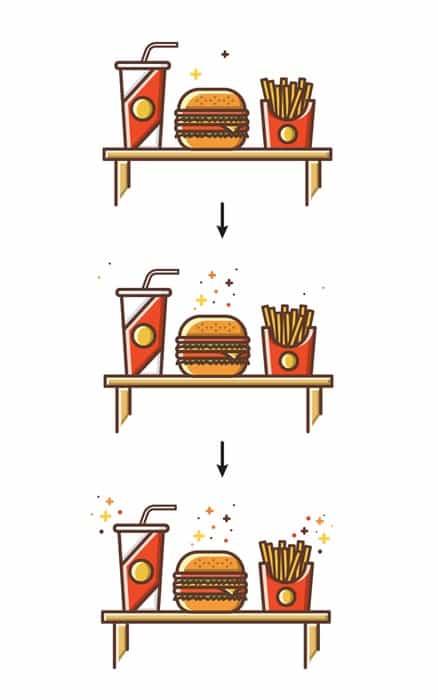
Now let’s add some ornament.
Step 1
Draw a cross by crossing the two 16px lines (draw with the Pen Tool (P) and give the lines 6px wide). Draw another one, but smaller – 10px in length.
Add some 4x 4px and 7 x 7px circles with no stroke.
Use the following colors for these elements: # FFCE0B, # F04903, # 653426, # FF8500.
Step 2
Draw the background – a rectangle the size of the artboard with color # F2E2C9. Place it in the background.
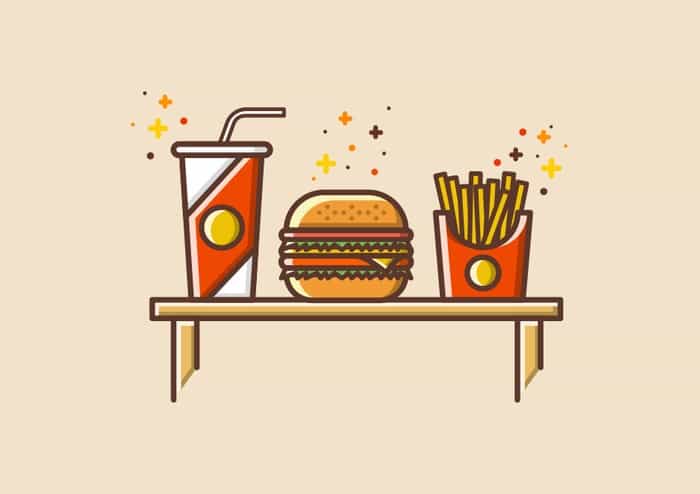
Result
Source: dejurka.ru
…

