
Cinemagraph effect: the easiest way
Cinemagraph effect: the easiest way
Want to learn how to create awesome animated pictures? Adding a cinemagraph effect to a photo isn’t as difficult as it sounds. The fastest and easiest way is to use the PhotoSHOW PRO program. In it, you can not only animate the image, but also create a slideshow of photos with music. This article will show you how to animate pictures in 5 minutes.
What is Cinemagraph Effect
Cinemography is not just a moving picture. This is a special kind of animation when the main part of the image is static, and only individual elements are movable. For example, tea is flowing from the spout of a teapot or hair is fluttering.

Such animated pictures weigh much less than regular GIFs and even more so videos. At the same time, they look very stylish and fresh.
How to achieve a cinemagraph effect in PhotoSHOW PRO
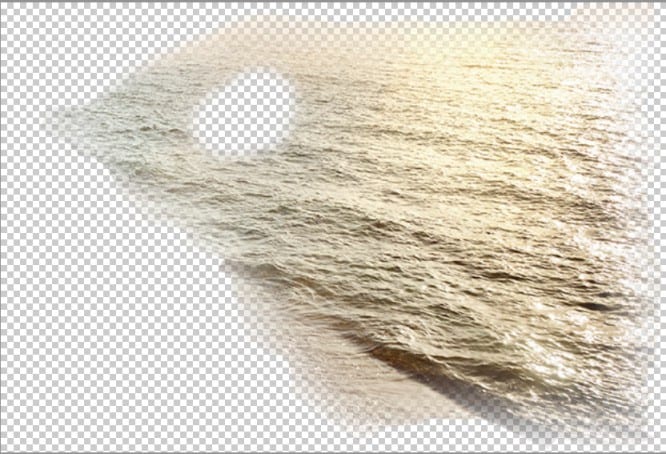
First you need to prepare a working material. As an example, we will take moving water in the picture. To do this, we need the photo itself and its separate section with water.
Preparing a fragment for animation
To cut out an element, you can use Photoshop or another graphic editor with the ability to save images with a transparent background. Such an opportunity is, for example, in the Home Photo Studio program, which is suitable even for novice users.
You will need to select the part of the image that you want to animate, cut it out from the rest of the image, blur the edges and save it with the “no background” setting in PNG format.
Making a cinemagraph effect
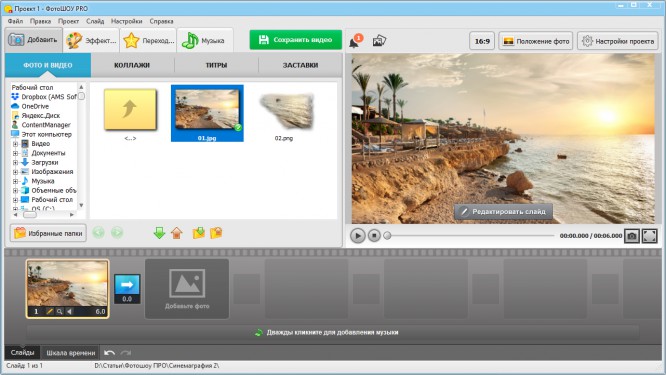
When everything is ready, go to the PhotoSHOW PRO program. Add your main photo to your project and follow these steps:
Step 1. Select the slide with the snapshot and go to edit mode. To do this, you need to click on the pencil icon. The photo will open in a new window. If black stripes appear at the edges, they can be quickly removed. Just click “Stretch Photo”.
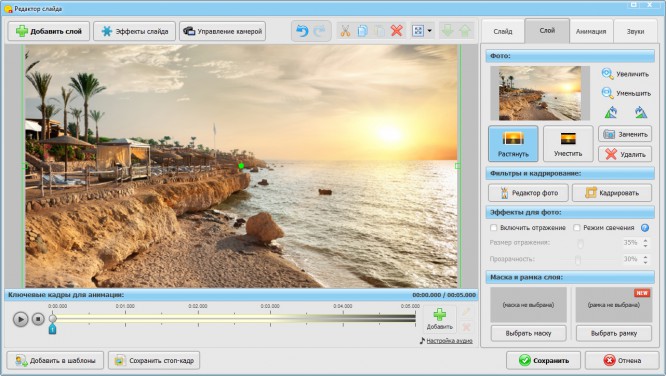
Step 2. Click the Add Layer button located in the upper left corner. Select Add Photo. From the folder, take the PNG image previously created in the photo editor. It will appear in the work area. Adjust its size and position so that it fits neatly where it was cut from. If the edges of the crop are visible, you can use a mask to soften the edges.

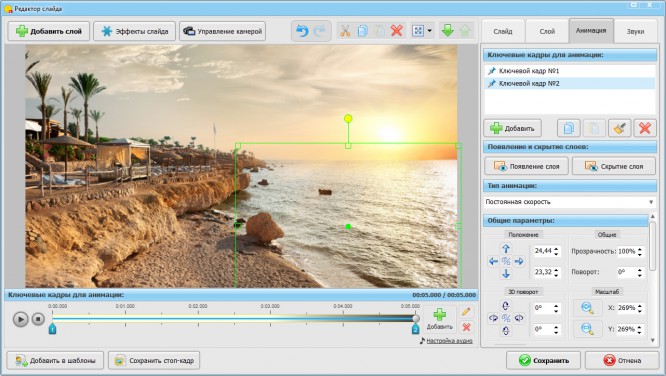
Step 3. To animate the fragment, go to the “Animation” tab. Let’s create a second keyframe and set the settings for it. To create the illusion of movement, you need to slightly shift the area with water and slightly increase it. Adjust the length of the slide show for the smoothest, most natural movement.
Step 4. Save the changes and return to the main program window. To the right of the slide, you can see a blue rectangle. This is a smooth transition that is set automatically. For our purposes, it is not required, so right-click on it and click “Remove Effect”. Now save the video in a format convenient for you, so that later you can be able to convert it to GIF.
Come up with your original ideas for applying the effect of cinemagraphs and implement them in the PhotoSHOW PRO program. At the same time, working in the editor is very simple, everyone can handle it. See for yourself, discover the world of endless creativity!
…

