
How to quickly assemble a spectacular picture with PixelSquid
How to quickly assemble a spectacular picture with PixelSquid
Did you have to painstakingly select sources for photo manipulations? Too lazy to master a 3D tool? Good news: there is a library of 3D models and a plugin for using them in Photoshop called PixelSquid. Today you can use it for free.

It is hardly suitable if you work with printed products – the resolution of the models is 2048×2048 pixels. But for presentations and the web, PixelSquid is a great helper.
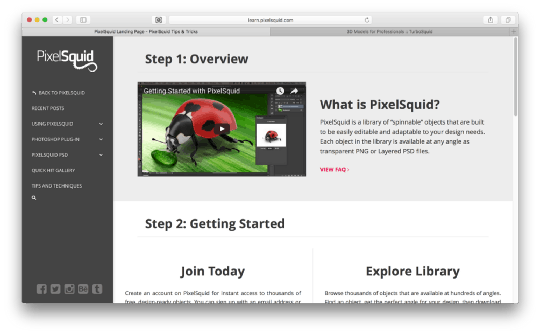
There is a training sub-site with video tutorials on working with the plugin and updated (a couple of updates per month) “how to”. There are several detailed lessons on the project page at behance, interesting works using PixelSquid are on the Facebook page.
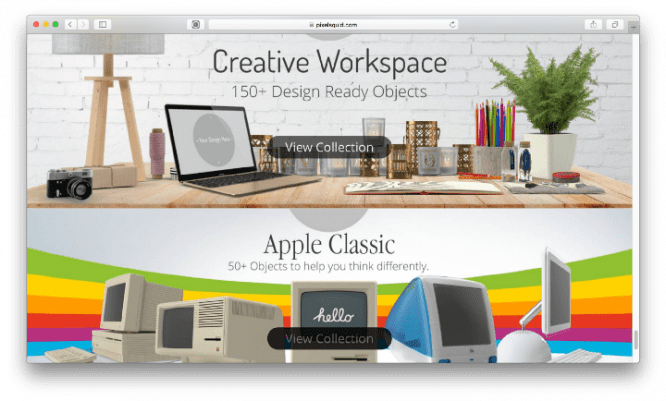
Well, on the website itself, collection covers set a good direction for creativity with models.
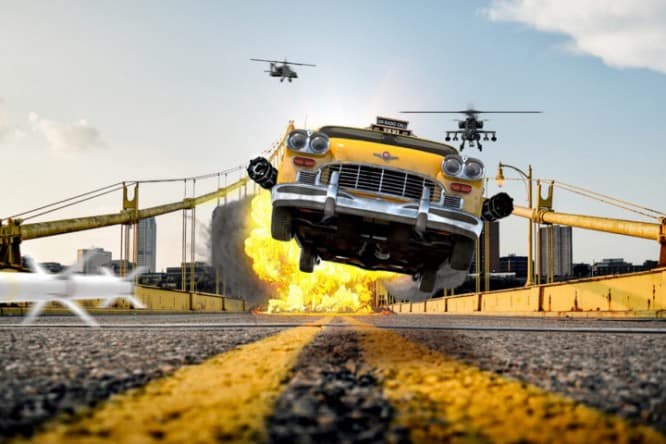
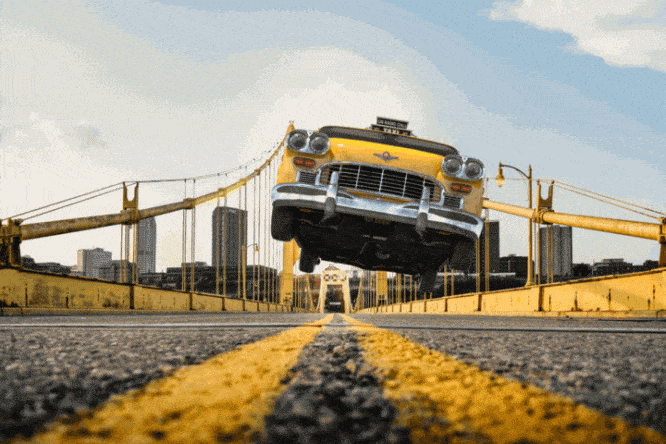
I want to tell you about PixelSquid from a practical point of view. Therefore, we will go through it in stages, creating a small project. Here’s what we get in the end:
Training
I wanted to do a spy scene in the spirit of Kingsman, but with an American taxi. So, we need the right car. Search shows us the following options:
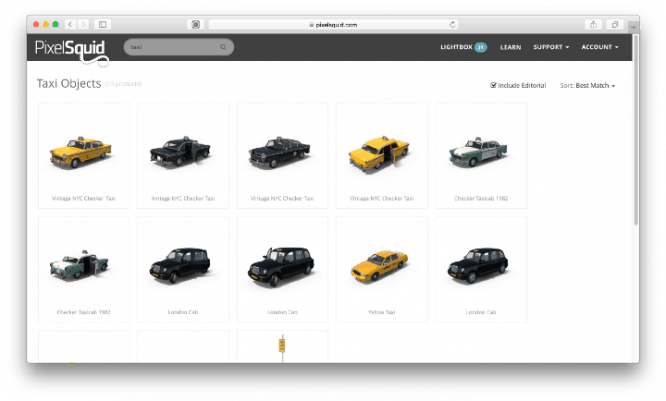
You can add a model directly from the preview page, but we want to take a closer look at the model.
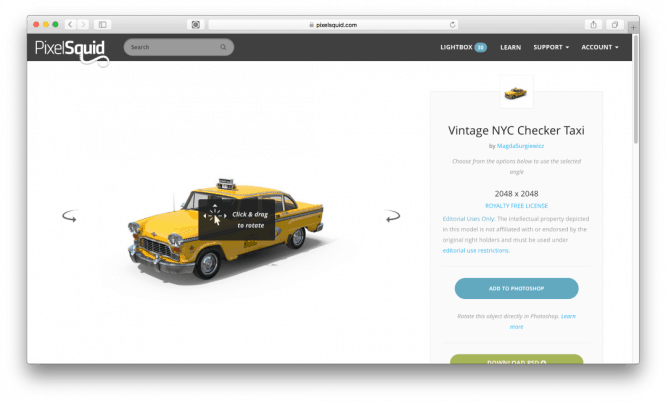
Okay – click the Add to Photoshop button. For now, the model just falls into the lightbox on the site. The content of the lightbox will be available to us in the plugin window in Photoshop.
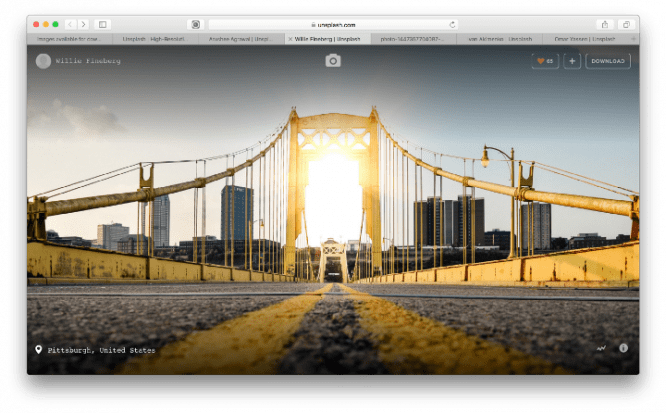
Now the background. I choose a photo on unsplash. Everything is ready to go.
Basis of the layout
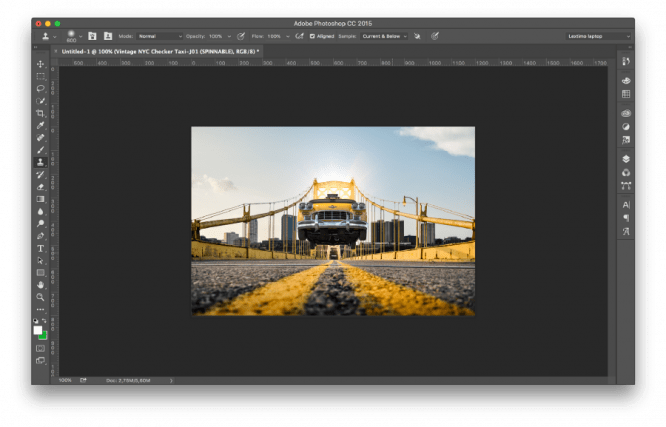
I make a 1200 x 800 pixel file with a resolution of 72 ppi and place the selected photo in the background.
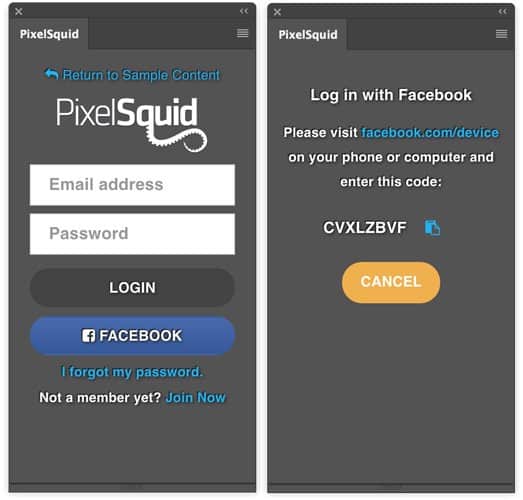
The plugin and the use of models in Photoshop are available after registration. You can register through social media accounts. Logging in to the plugin via Facebook is inconvenient, since you still have to confirm your device, and the implemented function of copying the confirmation code works every other time.
I already have the plugin installed, and I am logged into it. I place a taxi. The taxi is by default set to the center of the canvas in the start preview view.
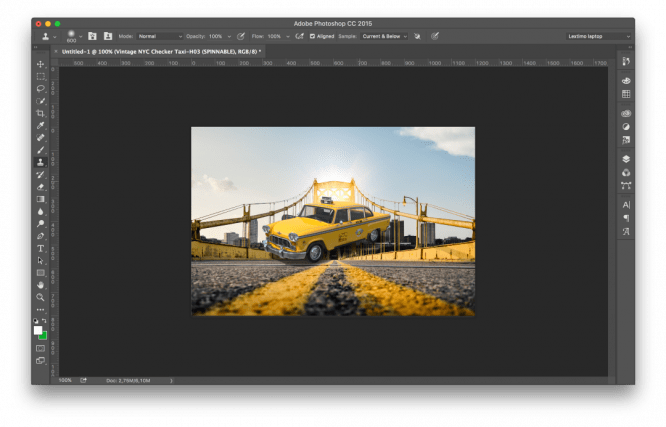
In the plug-in window, I expand the model to the desired angle. Rotation occurs in two planes with a certain step, therefore, despite the small preview window, it is not difficult to position the model.
I remove the shadows and then switch the resolution from low to high. The model on canvas immediately gains +100 Attractiveness.

Now our picture looks like this:
Details
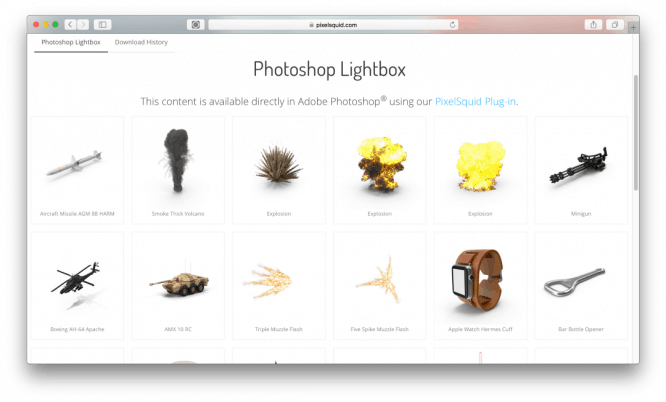
What we need for our plot: a good explosion, an enemy in the frame and, of course, a weapon. All this is in abundance on PixelSquid. We fill our lightbox:
I go back to Photoshop and continue to put together the composition. All actions are identical to what we did with the taxi: load the model into a file, set the angle, remove shadows (if necessary) and set the resolution higher. All this work takes 45 minutes.
Post-processing
My goal is to quickly put together a good picture with PixelSquid, so I don’t dwell on the nuances of retouching. A little about the possibilities for this. For small work, like ours, it is convenient to add layers to the project, or a smart-object with a model. We will get the following layer structure (for example, smart-object):
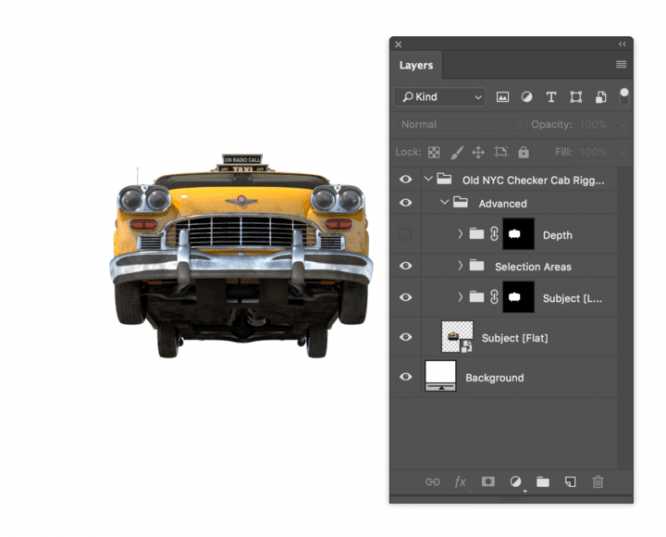
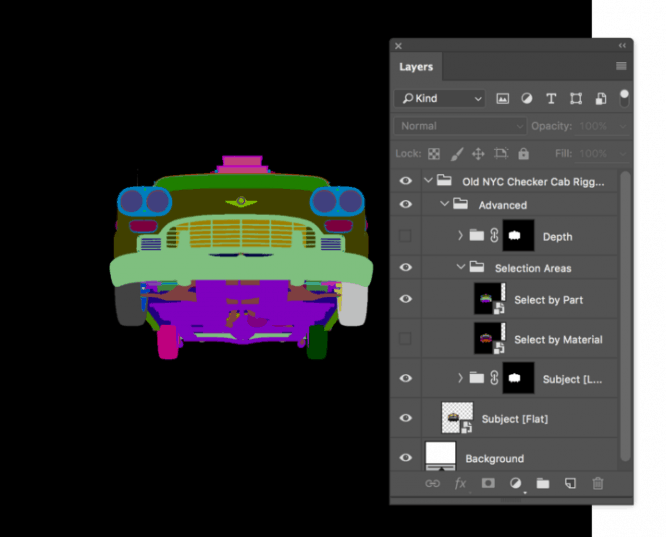
The Advanced group contains control of perspective depth, a guide to selection areas, and lighting settings.
This is how the selection of the selection regions of the model looks In order to work properly with them, you will have to conjure up the Refine Mask settings in Photoshop.
If we turn off the lighting layers in the settings, we get the following picture:
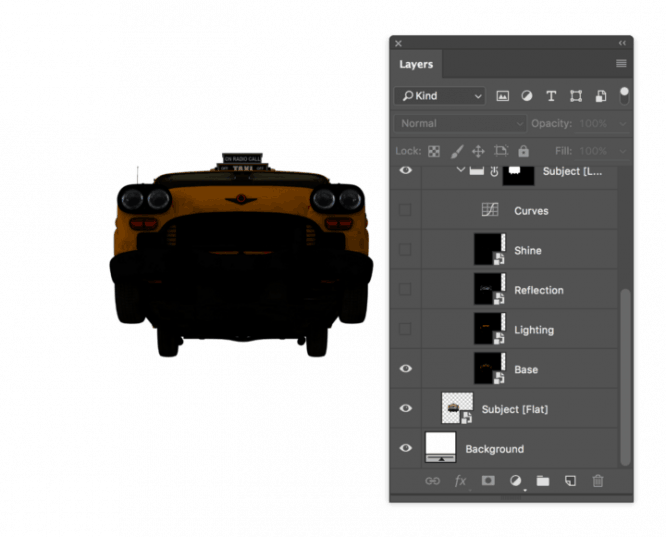
Working separately with each layer – Shine, Reflection, Lightning, Base – you can recolor the model and achieve the desired lighting effects. It’s worth watching the video on the PixelSquid channel.
Summary
pros:
+ large database of detailed 3D models;
+ simple plugin interface;
+ the possibility of fine retouching in the organization of layers;
+ saving time for searching and clipping sources;
+ free :-).
Minuses:
– permission restrictions;
– positioning restrictions;
– lighting restrictions on the model.
Not useful for professional retouching. In the printing industry, the use is limited. Great for quick sketches, small illustrations in print and web, and even for creating your own mockups like this:
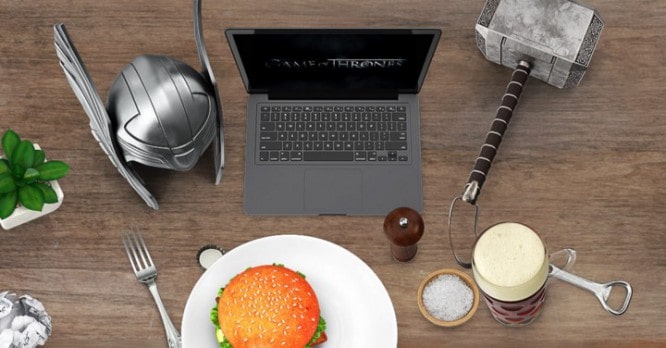
Source: Medium
…
