
How to Create a Typography Poster in Adobe Illustrator
How to Create a Typography Poster in Adobe Illustrator
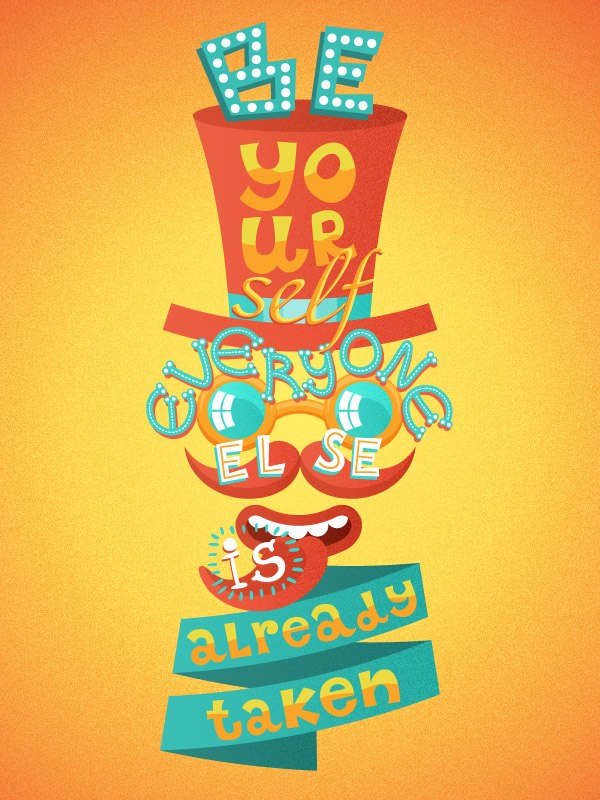
In this tutorial, we’ll create a vibrant retro typographic poster in Adobe Illustrator. The illustration is based on the statement of Oscar Wilde “Be yourself, other roles are already taken!”
We will paint and write, create brushes, use effects, and work with blend modes. The lesson is designed for users who are already familiar with Adobe Illustrator.
1. Draw a hat
Step 1
First, create a new document sized 600x800px… Create a palette that you will use to create your illustration. The palette should be such that the work turns out to be bright, but at the same time maintains the uniformity of the composition.

Step 2
Tool Ellipse / Ellipse (L) draw an oval. Then the tool Rectangle (M) add a rectangle to the oval. Make the points of the upper corners of the rectangle coincide with the side points of the oval.
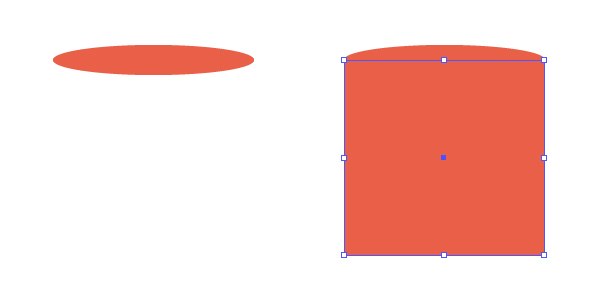
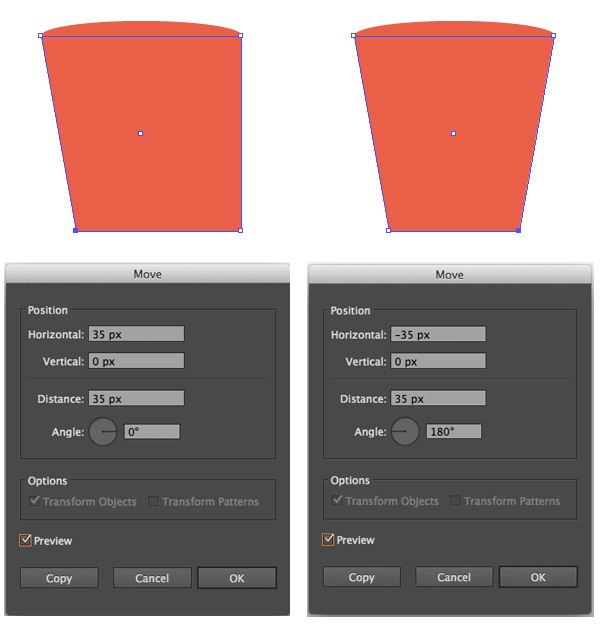
Select the bottom left point of the rectangle and press Enter, to open options Move… Configure the parameters as shown below. Then select the bottom right point of the rectangle and do the same with it.
Step 3
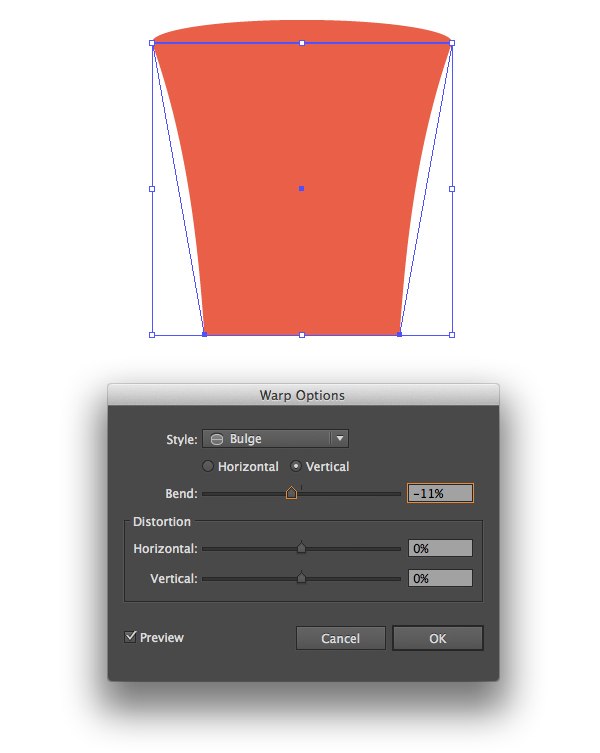
Do not deselect the rectangle. Select from the menu Effect> Warp> Bulge / Effect> Warp> Bulge. Adjust the effect as shown below.
Step 4
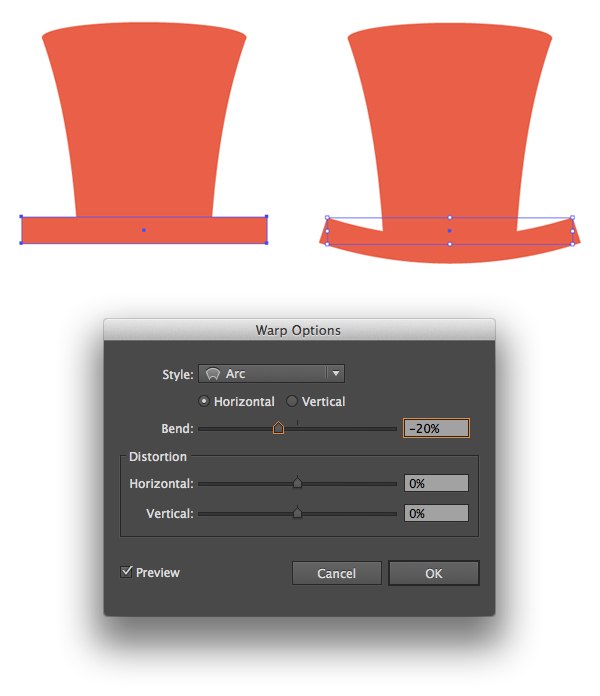
With a tool Rectangle (M) draw the brim of the hat. Use the warp effect this time Arc / Arc, setting it up as shown below.
Step 5
Now let’s decorate the hat with a ribbon. Duplicate the margins shape and bring the copy a little higher. Select the hat cylinder shape and ribbon copy and use the tool Shape Builder / Create Shapes (Shift-M) delete unnecessary parts by clicking on them while holding down the key Alt…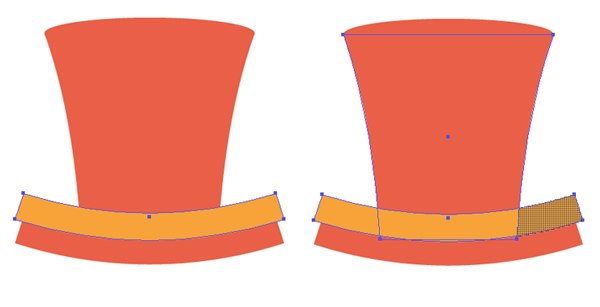
Step 6
Duplicate the hat cylinder shape, make it narrower and change for it Blending Mode on Screen / Lightening. Repeat this action again and remove unnecessary parts to leave highlights only on the ribbon.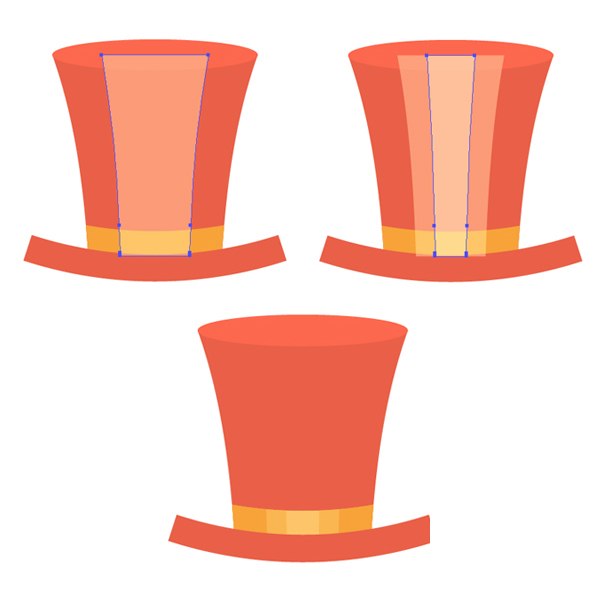
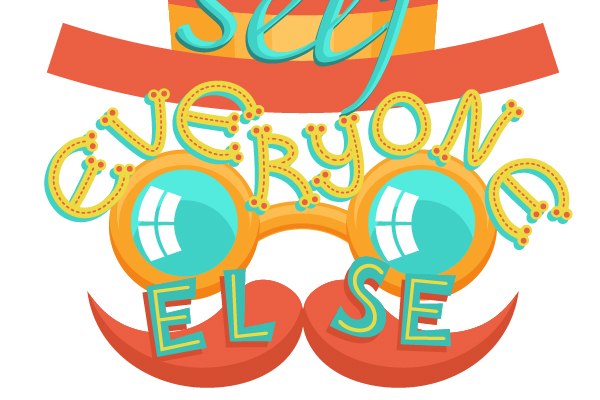
2. Draw glasses
Step 1
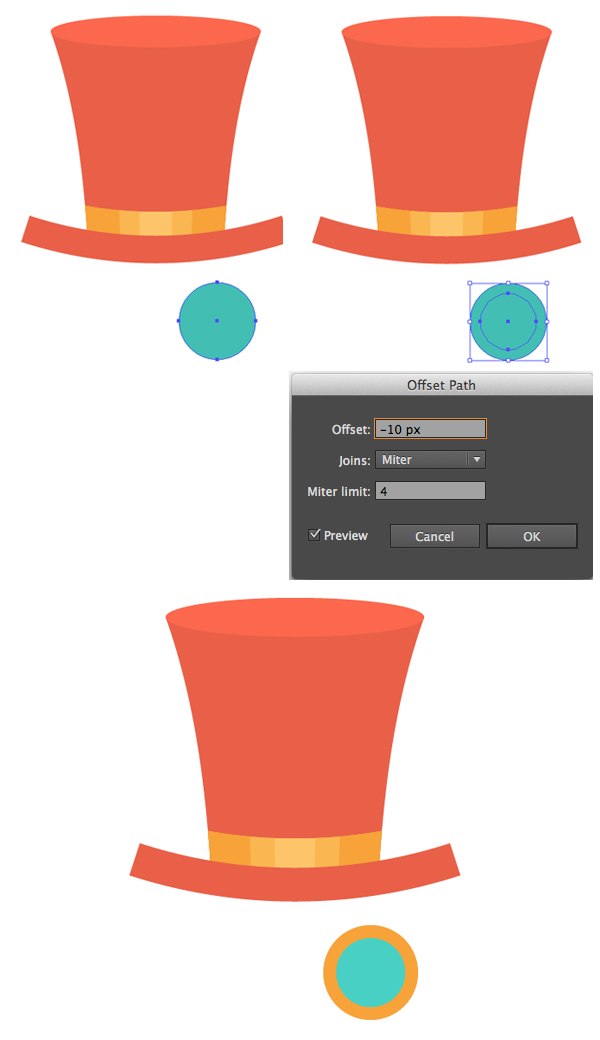
Tool Ellipse / Ellipse (L) draw a blue circle. Select from the menu Object> Path> Offset Path and give the indentation in -10px.Select the larger circle and give it an orange color.
Step 2
Add simple highlights and shadows to the frames of the glasses. Also add some highlights to the lenses. Draw a small white rectangle, duplicate it and place it slightly to the right. Duplicate both rectangles and duplicate them, placing the copy below.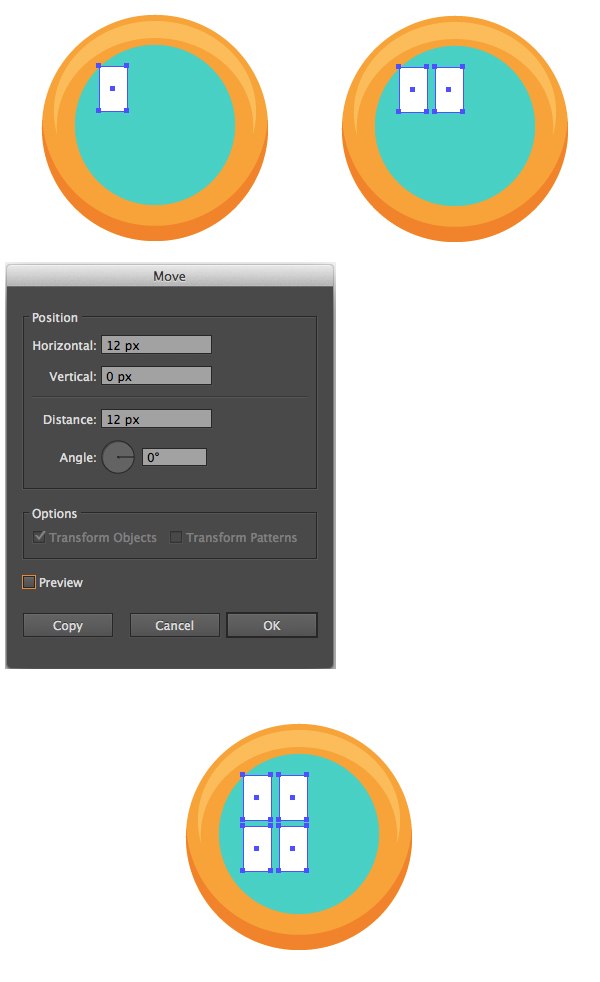
Step 3
Group the rectangles that make up the highlights and apply an effect to them Arc / Arc, bending the group into 20%. Then select from the menu Object> Expand Appearance and apply the effect to the object Arch / Arch, bending the object into 23%…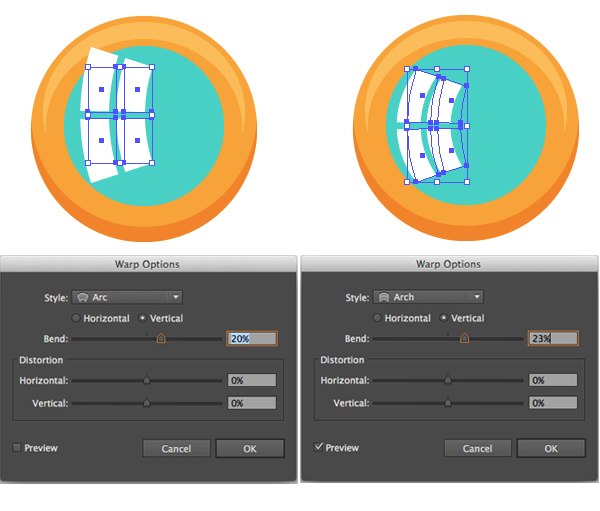
Step 4
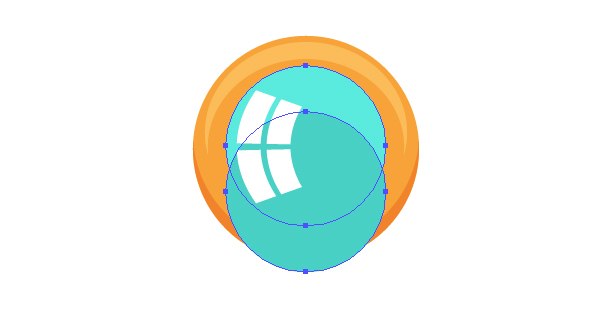
Let’s add some more volume to the lenses. Duplicate the lens circle, lower the copy, make it a little darker and use the tool Shape Builder / Create Shapes (Shift-M) remove the excess.
Step 5
Duplicate all the shapes that make up the rim and highlights lens and place the copy to the right. Combine the lenses using a narrow rectangle. Give this rectangle a simple shadow and highlight.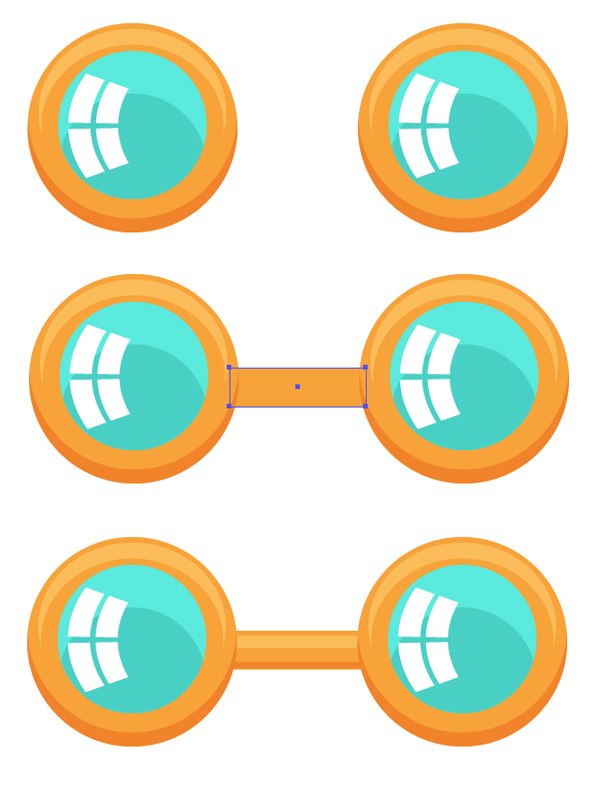
Step 6
Group all the shapes that make up the rectangular part of the frame and apply the effect to the group. Arc / Arcsby bending the object by 40%…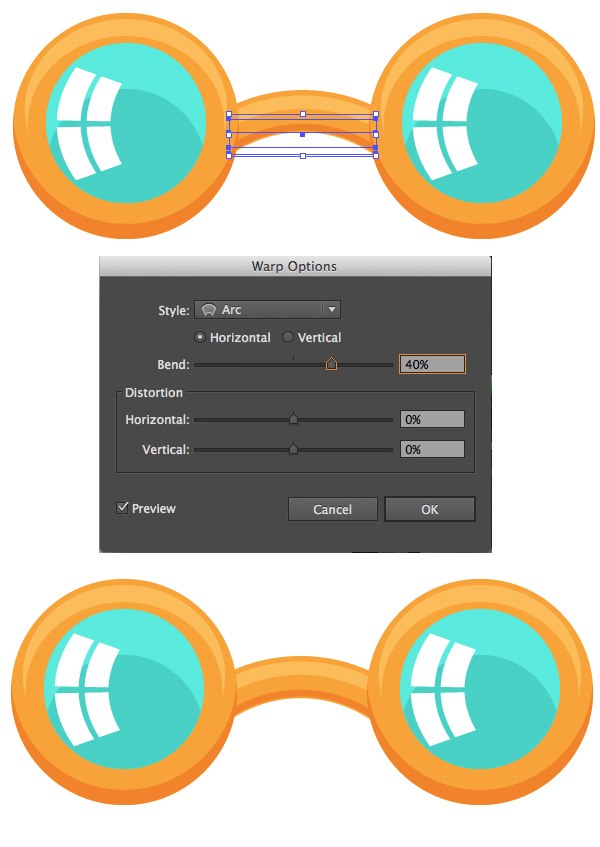
3. Draw a hipster antennae
Step 1
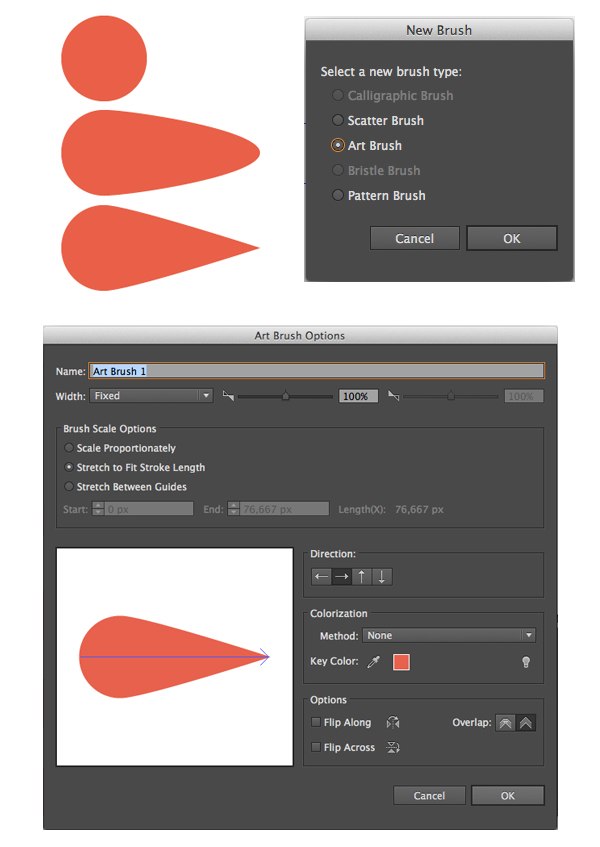
To create the mustache quickly, we’ll create a simple brush. Create a circle and tool Direct Selection (A) drag the leftmost point of the circle to the left. Click on this point with the tool Convert Anchor Point (Shift-C), to turn it into a corner.
Drag the resulting shape to the palette Brushes / Brushes and create Art Brush You can leave the default options.
Step 2
Create a curved curve with the tool Pencil (N) or Arc / Arc and apply the brush you just created to it. Without removing the selection from the subject, select from the menu Object> Expand Appearance / Object> Expand Appearance… Take a tool Smooth and drag over the object to get rid of a lot of unnecessary points and make the whisker smoother.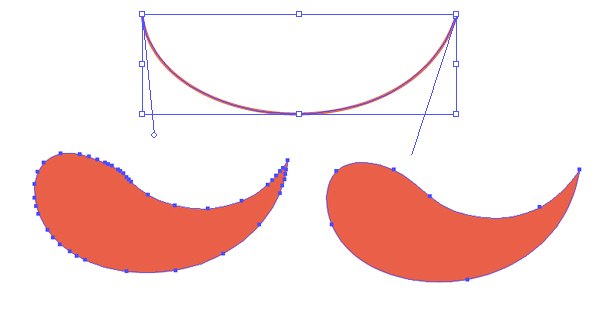
Step 3
Add a mustache simple shadow, place it under the glasses and using the tool Reflect (O) Flip the copy of the mustache vertically to create a full mustache.
4. Draw the mouth, teeth, tongue and tape
Step 1
Tool Rounded Rectangle draw a shape with parameters as shown below. Apply an effect to it Arc / Arc, bending on -38%. 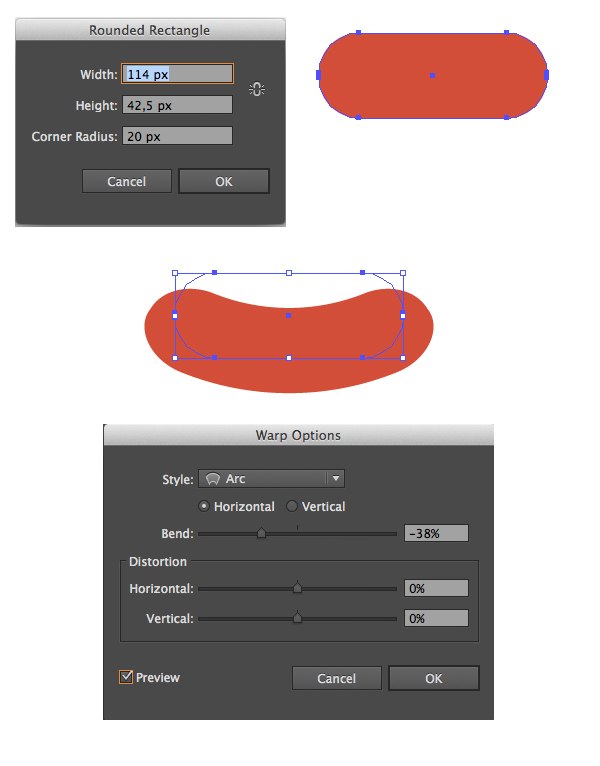
Step 2
Create another smaller mouth shape and make it darker to define the lips. Create a small white circle in the left corner of the mouth, duplicate the circle and place a copy in the right corner. Select both circles and in the menu find Object> Blend> Make / Object> Blend> Make, set up the transition as shown below.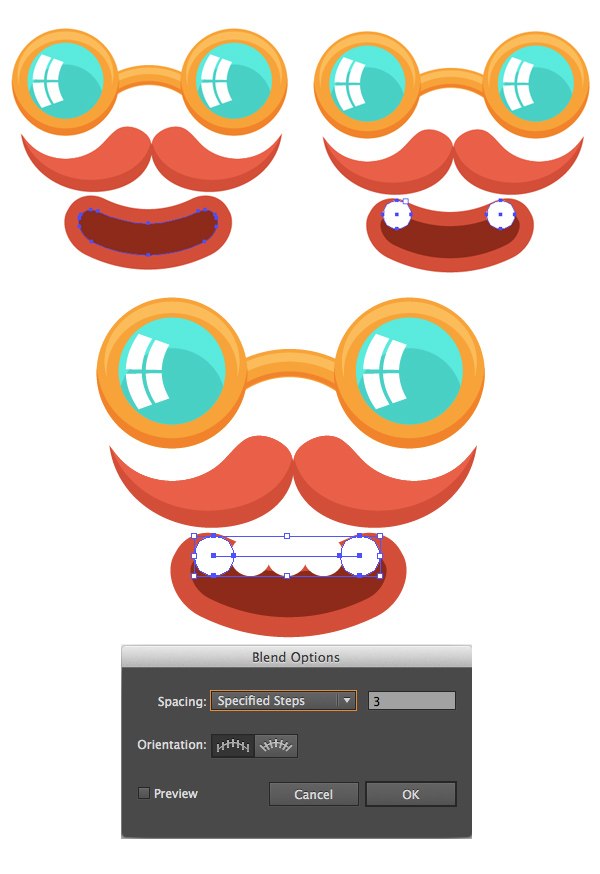
Step 3
Select a group with a transition using the tool Direct Selection (A) and edit the line to make it more curved. Make a copy of the inside of the mouth, place it above the teeth, select the teeth and this copy, right-click on them and select Make Clipping Mask / Create clipping mask. This will hide the extra parts of the teeth.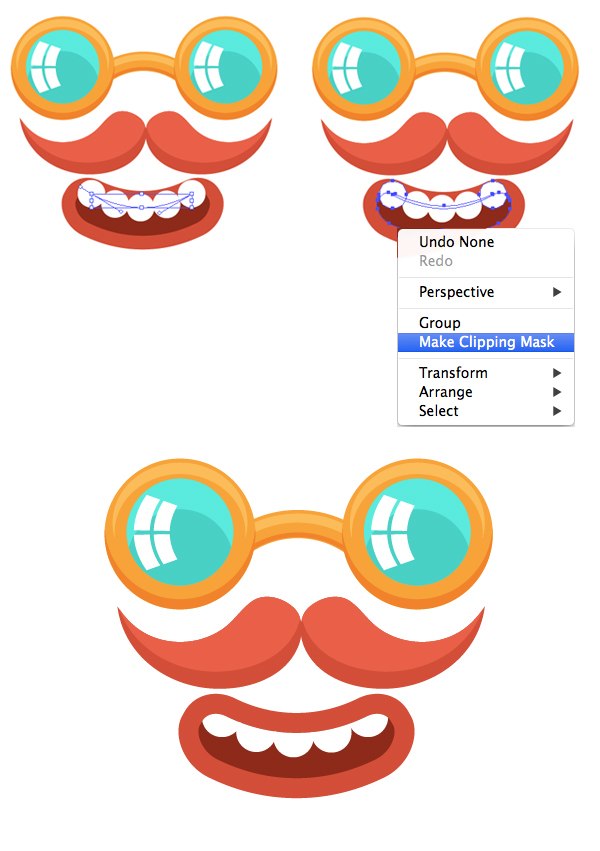
Step 4
Create two circles as shown in the image below and also hide their extra parts with a clipping mask. Tool Paintbrush / Brush (B) draw the tongue using the brush with which we painted the mustache.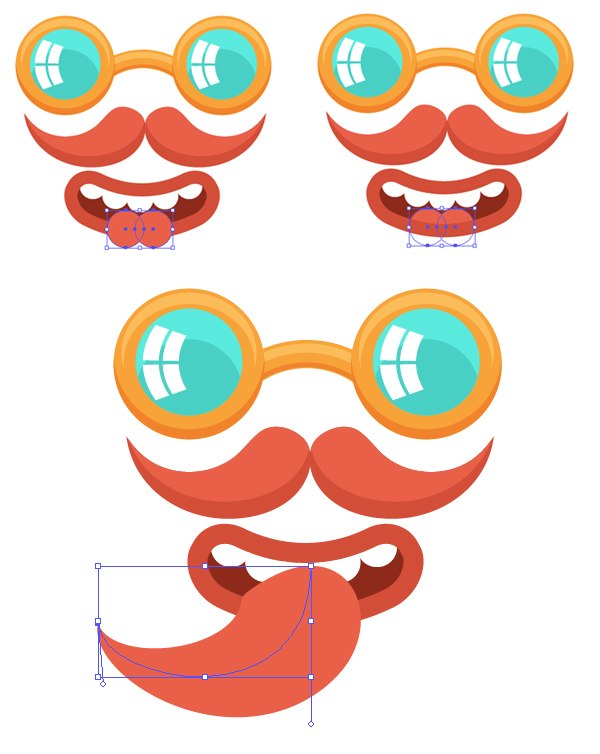
Step 5
Expand the object and get rid of the unnecessary upper part. Make the tip of the tongue more realistic with the tool Convert Anchor Point (Shift-C) and paint the shadows with the tool Pencil (N).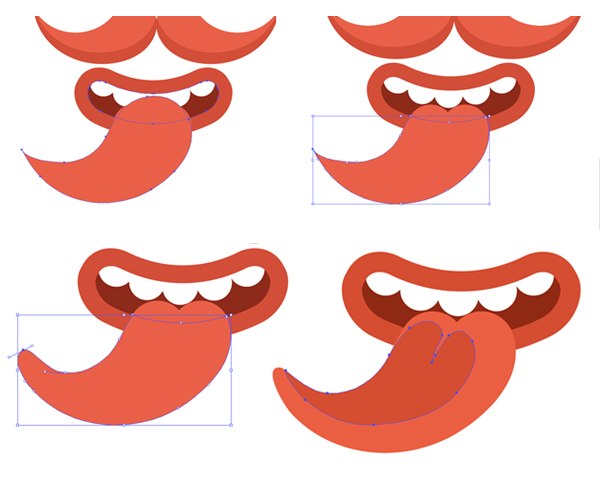
Step 6
Now let’s take up the tape. Tool Rectangle (M) create two turquoise rectangles like in the image below. Select the rightmost points of the rectangles with the tool Direct Selection (A) and pull them up to bevel the shapes. Draw the dark parts to the ribbon rectangles, group all the ribbon objects and apply the effect to them Arc / Arcby bending it to -ten%…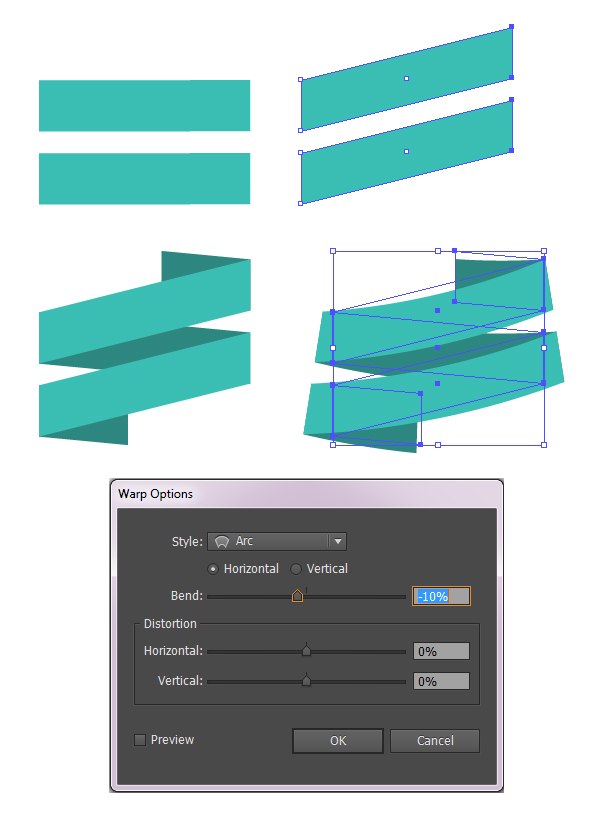
Here’s what you should get at this stage:
5. Create typography
Our slogan is: “Be yourself; everyone else is already taken ”/” Be yourself, other roles are already taken! ” Is a quote from Oscar Wilde.
Step 1
Arm yourself with a tool Pen / Feather (P) and start creating the first letter – “B”. Create straight lines and cut out the middle with the function Minus Front in the palette Pathfinder… 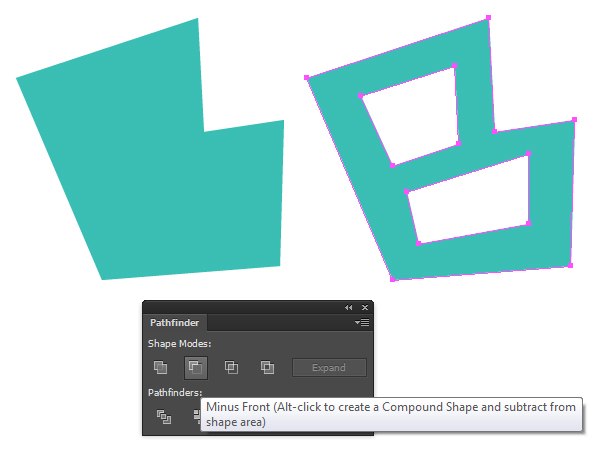
Step 2
Let’s decorate our letters with circles. Create one circle in one corner, place a copy in the other corner and create a transition between them using the tool Blend / Transition (W)…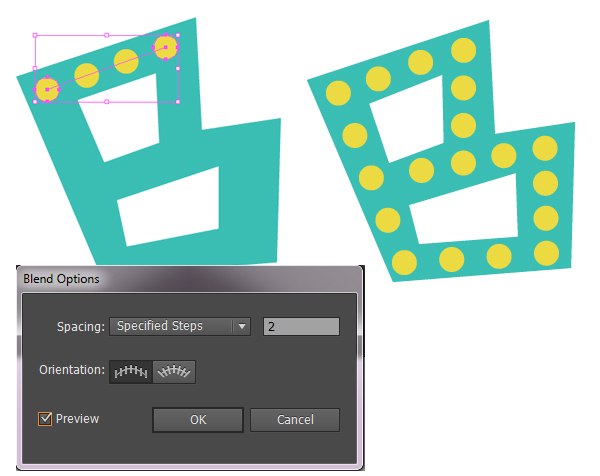
Step 3
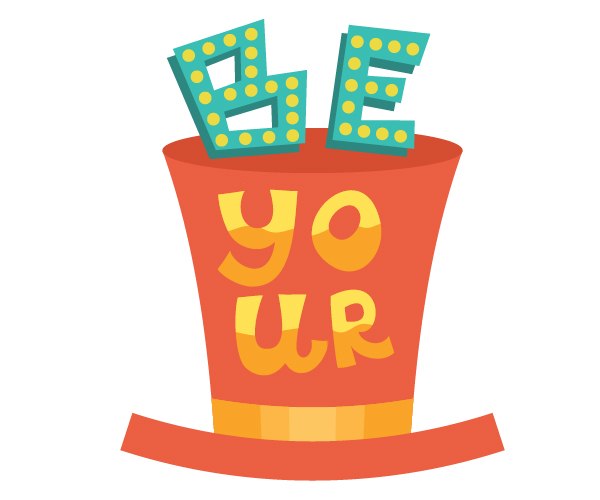
Create the letter “E” in the same way. Now let’s add some volume to the text using shadows. Duplicate the shapes of the letters, place the copies in the background, make them darker and move them a few pixels lower and to the left.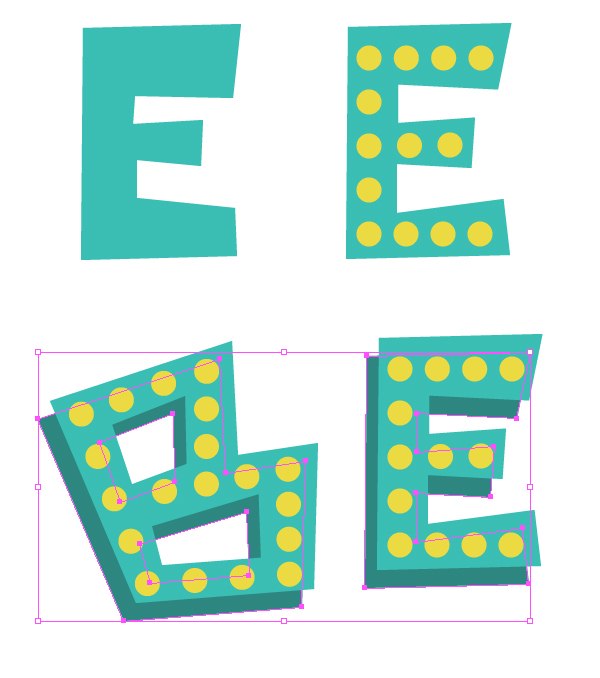
Place the letters on top of the hat.
Step 4
Now grab your tool Pencil (N) and hand-draw the letters for the first part of the word “yourself” in a simple cartoon style.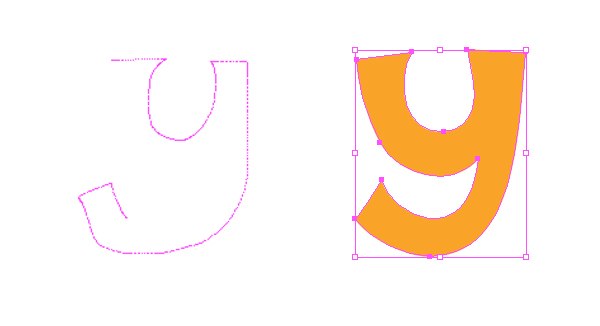
Draw a freeform shape with a lighter tone over the text and using the tool Shape Builder / Create Shapes (Shift-M) remove excess parts as shown in the picture below.
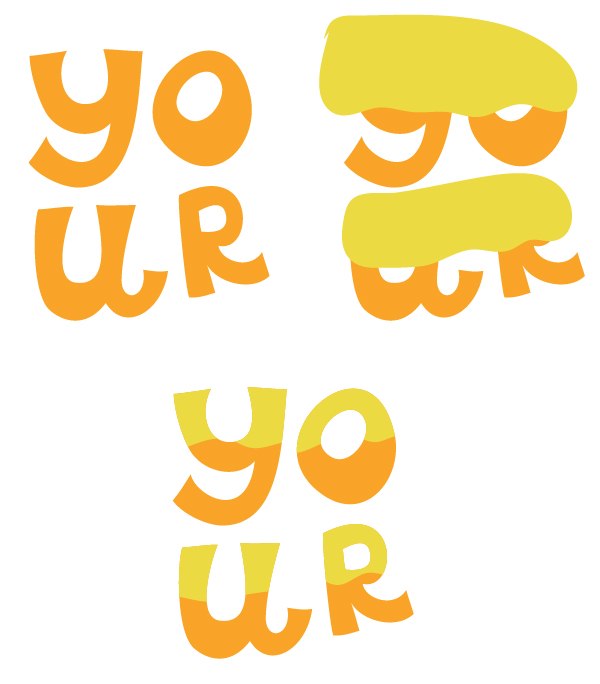
Place the letters on the top hat.
Step 5
Use any calligraphic font to write the second part of the word. The font used in the example is “Adventure”, but you can choose any italic font. Expand font and add simple highlights and shadows to it. Apply an effect to the text Arc / Arcto create a slight curve that follows the curve of the brim.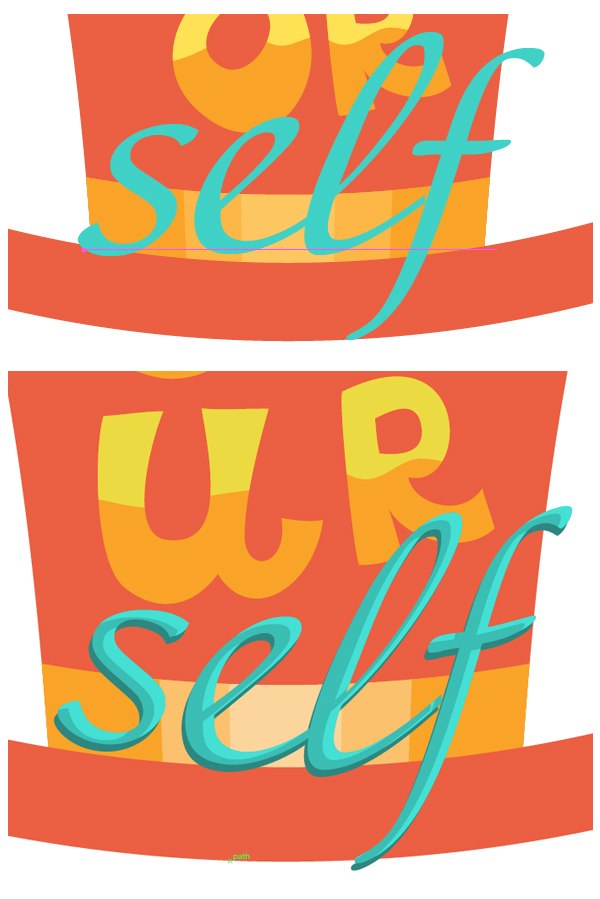
Step 6
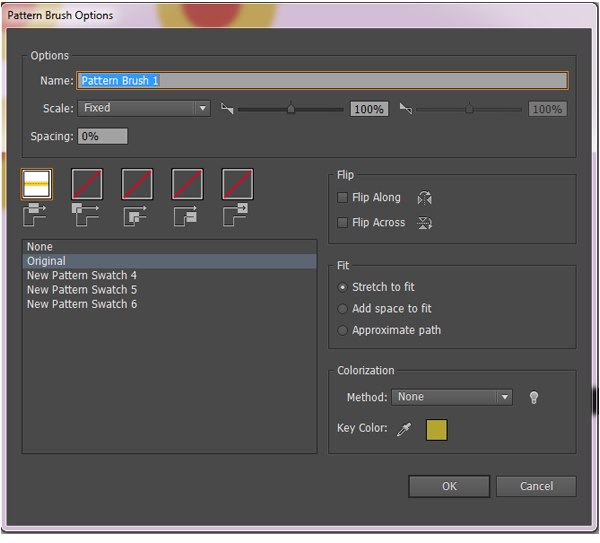
The next word is “everyone”. Let’s create a simple pattern brush (Pattern Brush) for this label. Create a long rectangle with a dotted line inside it. Draw a simple circle shape to serve as the tips for the letters.
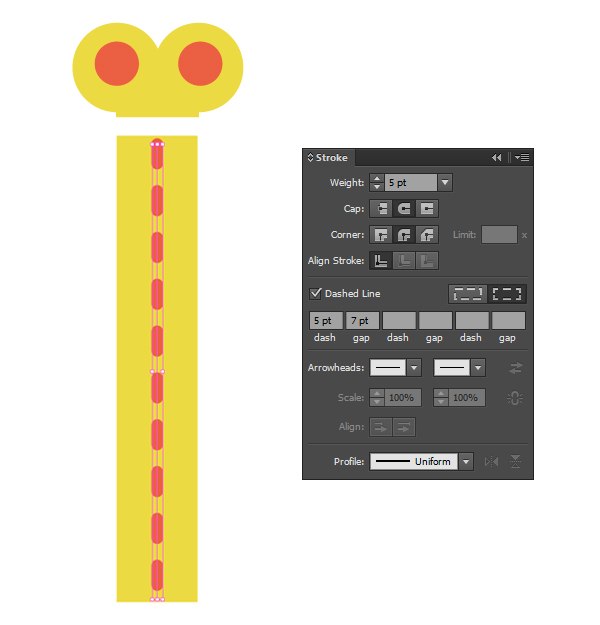
Expand the line, group the rectangle and line and create from them Pattern Brush with default settings.
Take a tool Paintbrush / Brush (B) and create letters, each with a few strokes. Attach a circle shape to the tips of the letters.

Step 7
There is also a lazier way to attach the tips to the letters. You can add them to your brush. Drag the nib shape group and its mirrored copy (individually) to the palette Swatches / Samples, and then in the window Pattern Brush Options specify them as start and end tiles.
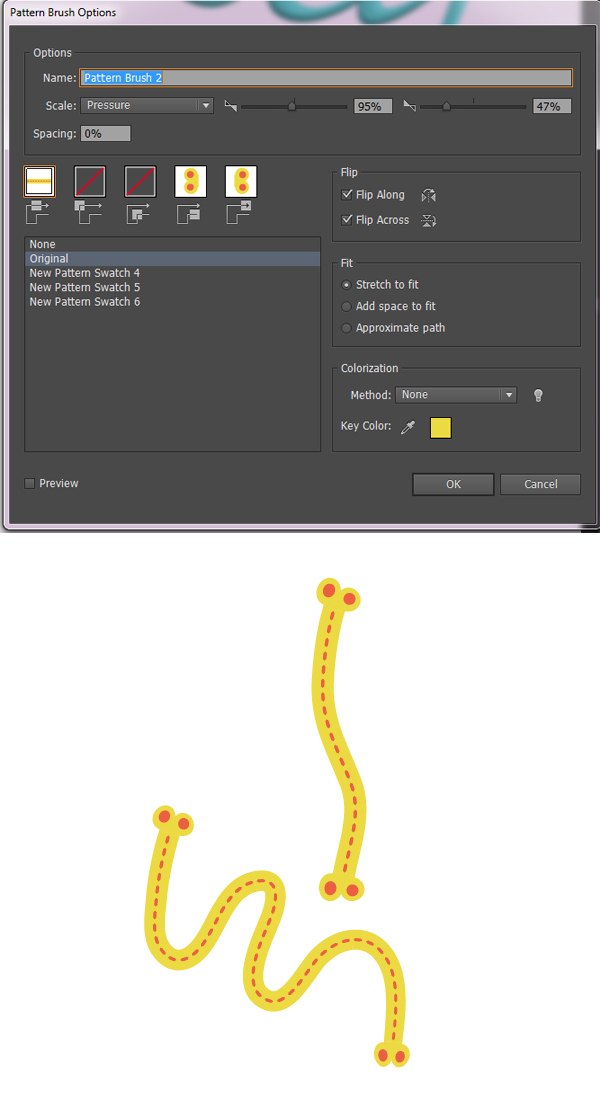
This will spend less time, but sometimes the shapes will deform and take on a bad look.
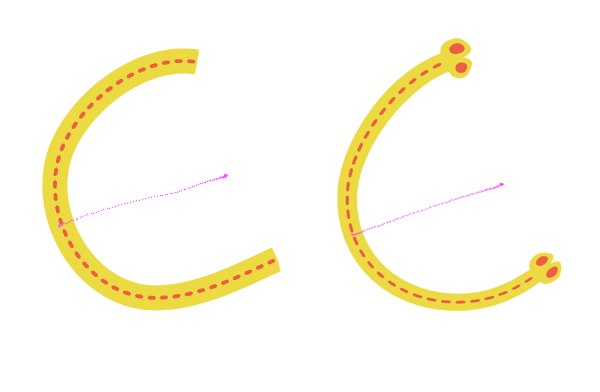
In any case, this word will be smaller than the others and this defect will not be so noticeable. Choose for yourself which technique to use. You can compare the methods below.
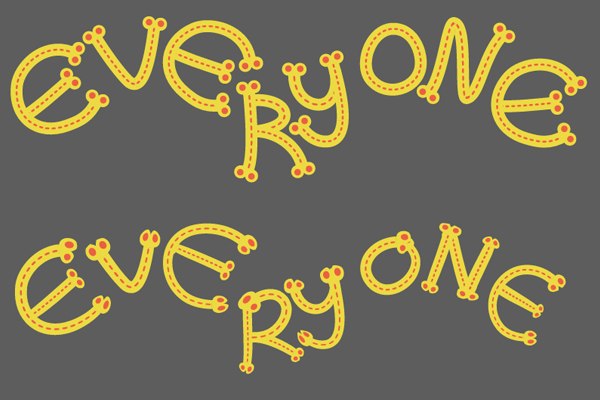
Place the letters above the glasses, add a bright shadow to them. Tool Pencil (N) add the word “else” and place it on the mustache.
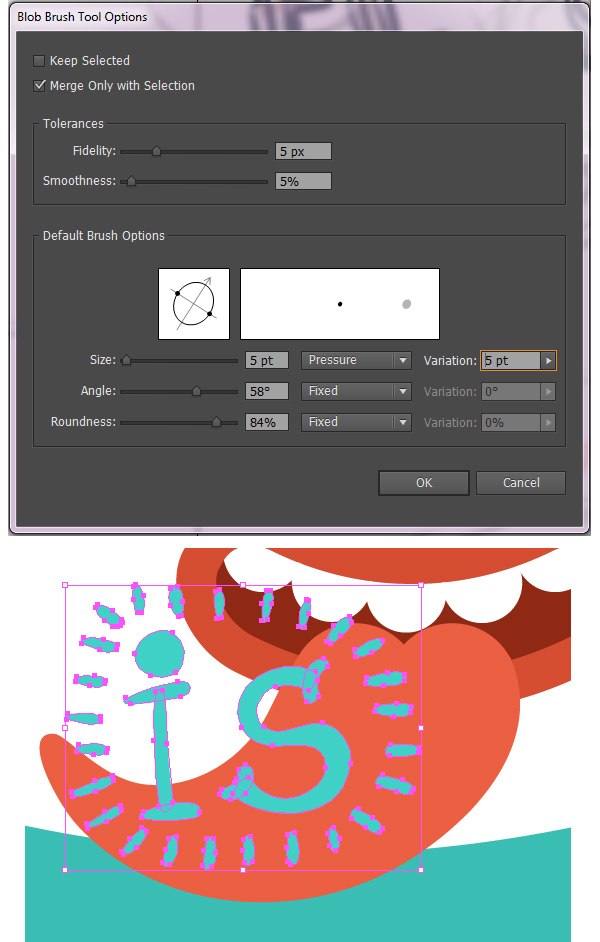
Step 8
Let’s try another tool for manual work in Adobe Illustrator – Blob Brush (Shift-B). Set up the instrument as shown below and use it to write the word “is”. Then decorate the word with short beams that surround the word.
Step 9
Finally, create the last two words – “already taken” – in the same way that you created the word “your” using the tool Pencil (N)… Place the words on the ribbon.
6. Giving the poster a grainy, retro look
Step 1
Now we need to create a nice background that will not distract us from the content and emphasize the brightness of the illustration. At this point, you can experiment with colors. If you notice, in the example, the colors of the words “be”, “everyone else” and “is” have been replaced with other shades from our palette. 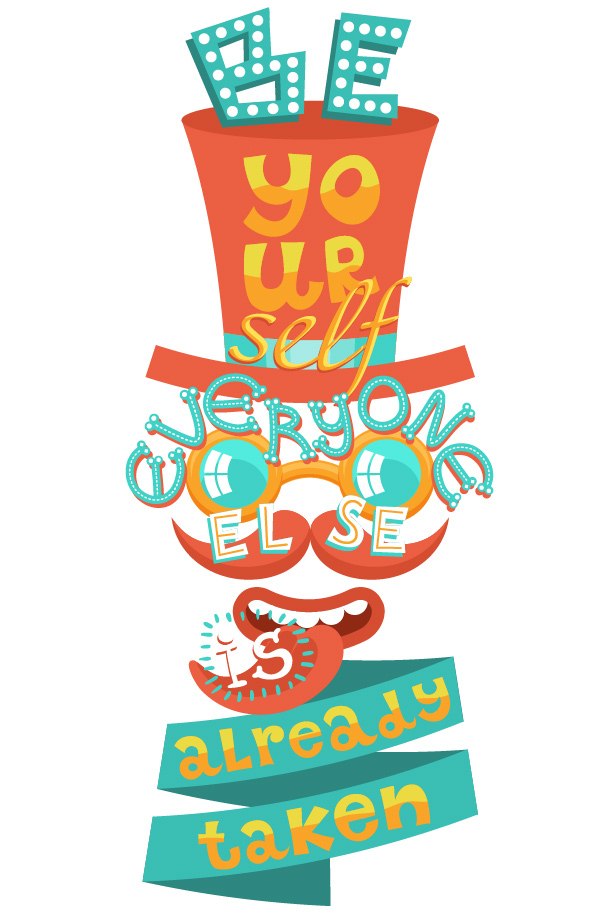
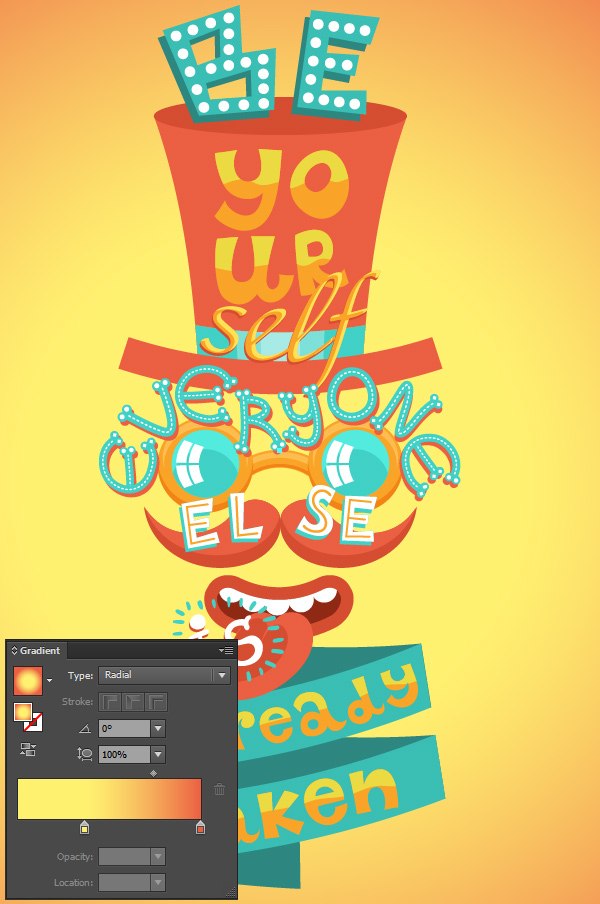
Step 2
Create a rectangle in the background and fill it with a radial gradient – lighter in the center and darker towards the edges.
Step 3
Now select the top of the hat, copy and paste it in front (Control-C> Control-F). Fill the shape with a linear gradient from white to dark red and specify the shapeBlending Mode Multiply / Multiplication.
Select from the menu Effect> Effect Gallery> Textures> Grain / Effect> Effect Gallery> Texture> Grain and adjust the effect as shown in the picture below. Later you can change the effect parameters via the palette Appearance…
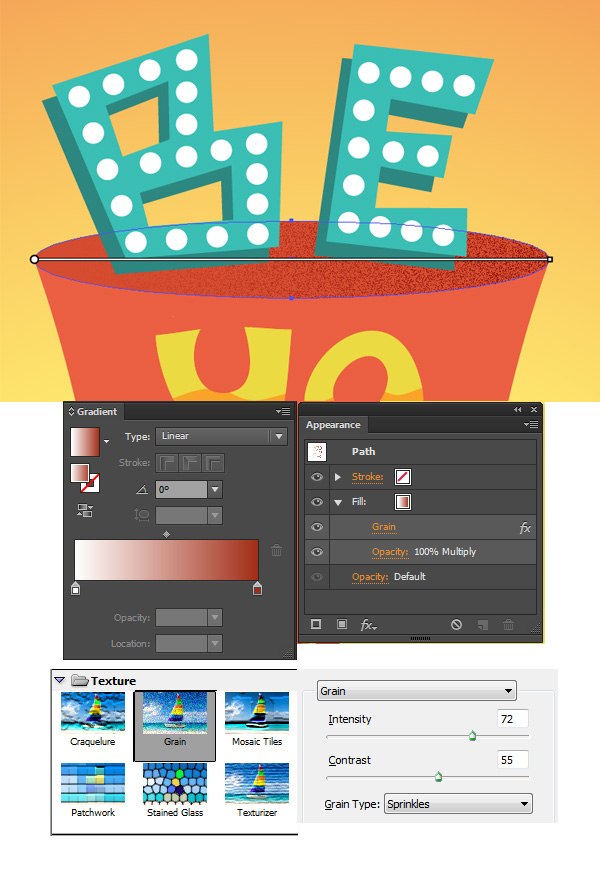
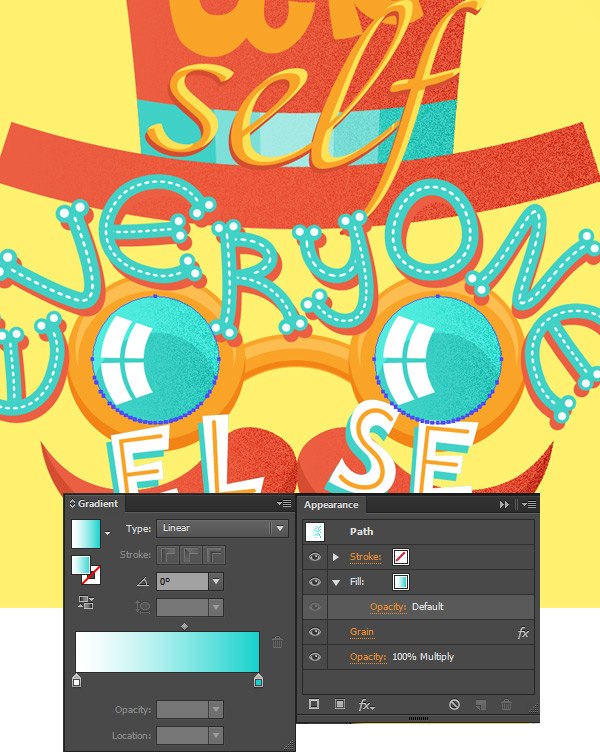
Add the same grain effect to other elements of the illustration by choosing the appropriate gradient colors.
Result
Source: dejurka.ru
…
