
10 tricks of the Jedi in Photoshop
10 tricks of the Jedi in Photoshop
A series of tips from the Feel Factory team from the “Pfff, I knew that for a long time!” Series.
In fact, these are rather useful tools and techniques that help in working on projects in CG, identity and the web that you might not know about.
Let’s start with some useful tricks in Photoshop, and let’s go!
1 – Content-aware fill
Edit> Fill or Shift + Backspace

A convenient tool for removing objects from the image, taking into account the content, just select the object with the lasso, click Shift + Backspace and OK…
2 – Blending Options
fx> Blending Options
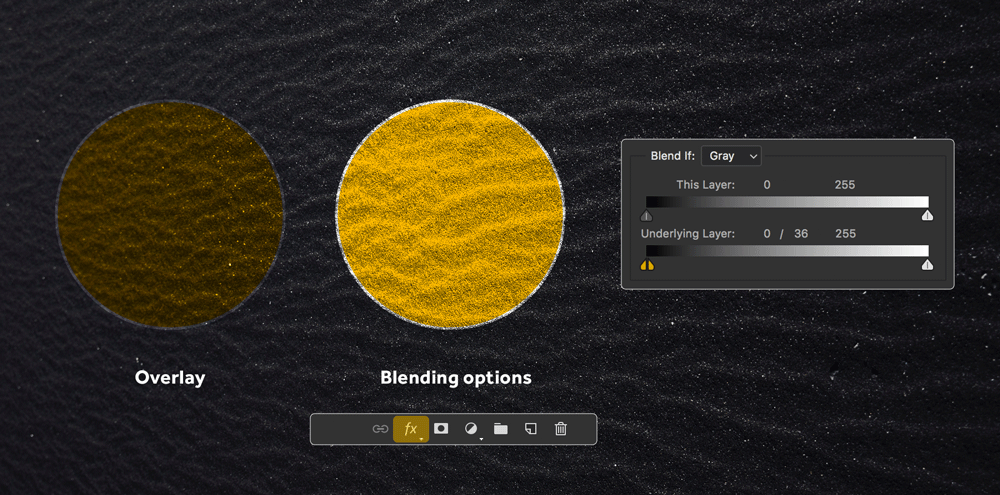
It happens that the usual blending modes are not suitable for the task, in this case, you can use the sliders in the layer blending properties to help you. Hold down the key Alt pull the triangles depending on what you want to get.
3 – Defringe
Layer> Matting> Defringe
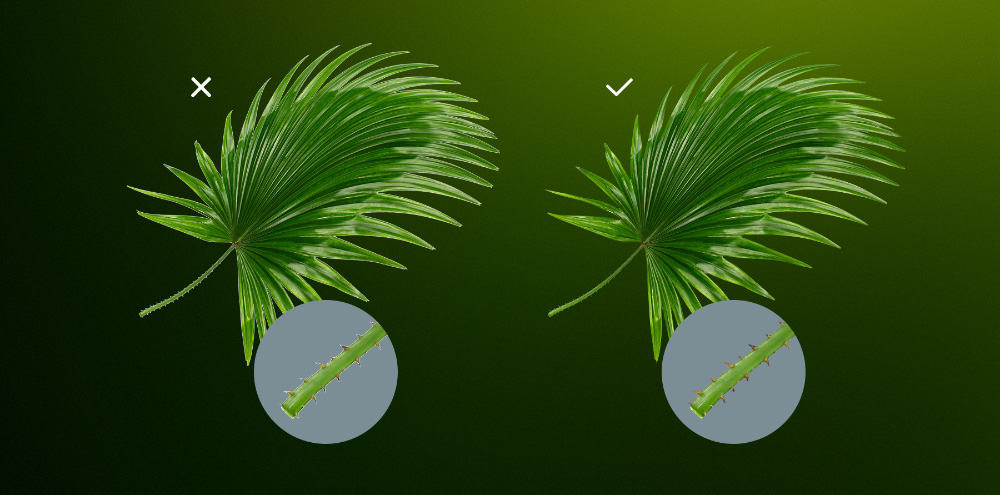
A tool for processing the edges of an image. A simple trick to get rid of light or dark edges in a layer. This command recolours the pixels on the border of the selection to match the color of pixels located at a certain distance within the area to help fit the object better.
4 – Rubber Band
Top control panel> Rubber Band
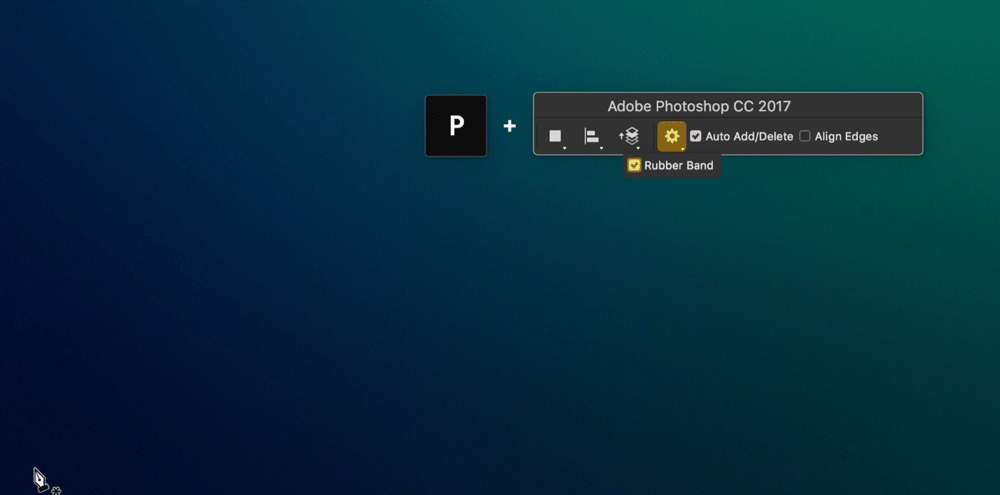
Surely many do not know that there is such a check mark in the pentule settings, try it, you will like it 🙂
5 – Normal noise
Filter> Camera RAW Filter or Shift + Cmd (Ctrl) + A
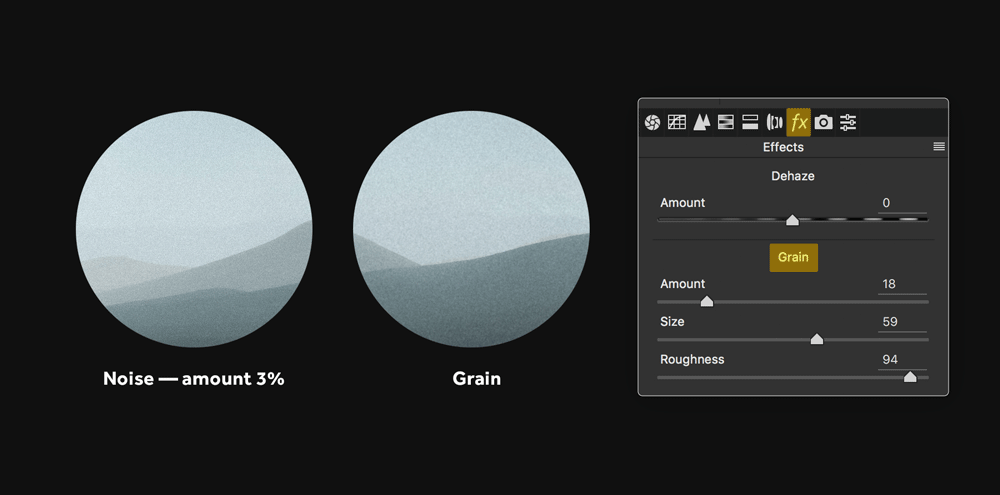
The standard noise filter is often not suitable for compositing, it is too “digital” and has no settings, so it is better to use Grain in Camera RAW Filter, whose settings allow you to change the grain size and its sharpness. This often helps in final post-production to give the image an optical naturalness.
6 – Nik Collection by Google
www.google.com/nikcollection/
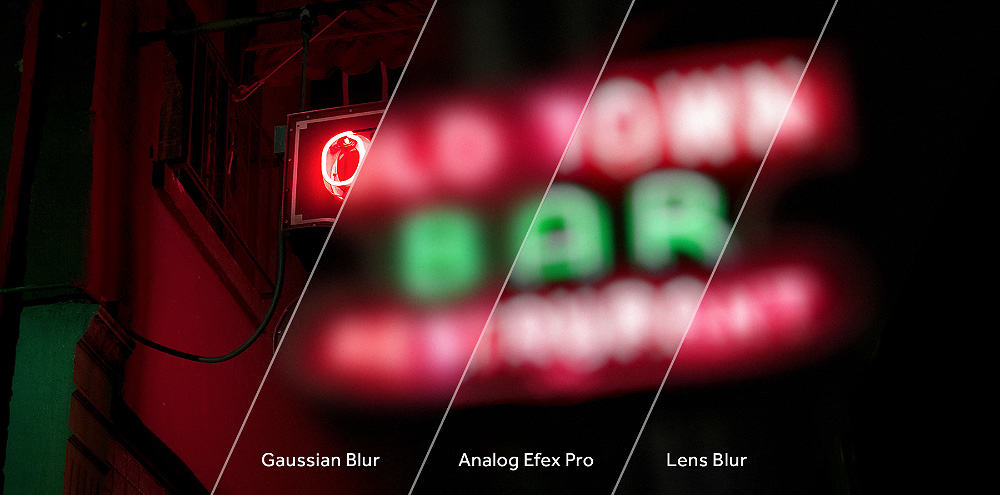
An excellent plug-in for photoshop with various effects and presets, there is point editing. It’s not without trash, of course, but there are also some good tools. For example, in Analog efex pro there is a section Classic Camera, where you can simulate the optical distortion of the camera, there is a fairly correct Boke effect, blur at the corners and other tools that will help make the picture more realistic and vivid. And in Color Efex Pro there are convenient tools for increasing the contrast and detailing of images (Tonal Contrast, Pro Contrast, Detail Extractor)…
7 – Chromatic aberration
Filter> Lens Correction or Shift + Cmd (Ctrl) + R
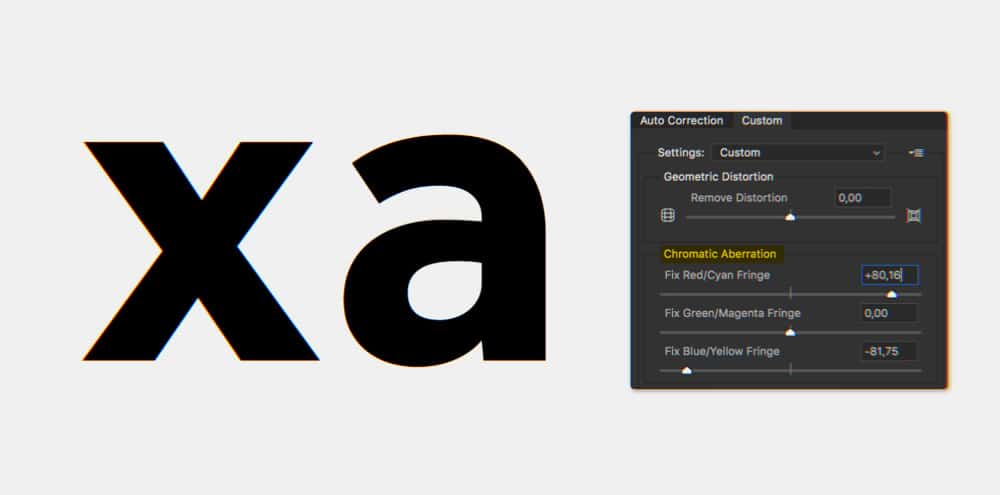
If it is customary to remove chromatic aberrations in the photo, then when composing, especially scenes using 3D, these distortions, on the contrary, make the picture more natural, bringing raw renders to life. Just keep yourself in control, do not abuse it 🙂
8 – View a specific layer
Alt + left mouse button while on a layer
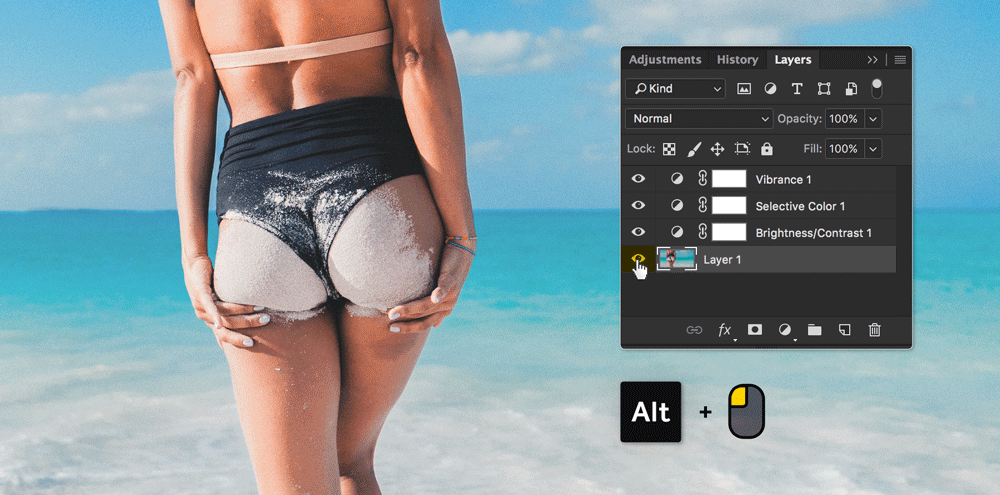
Sometimes you need to look at the original of a specific layer, so as not to copy it on top of all layers, just hover over the eye icon next to the layer and hold down the key Alt click on left mouse button, pressing it again returns to its original state.
9 – Crop taking into account the content
Crop Tool> Top Control Panel> Content-Aware

Starting with the version of Photoshop CC (2015.5), it became possible to crop taking into account the content, to do this, click C key and check the box Content-Aware in the top control panel. By the way, in the same panel there is a wonderful tool Straighten, which helps to align the horizon, just draw a line along the object and the algorithm will do everything by itself.
10 – Fast export of layers
Right mouse button on selected layers> Export As …
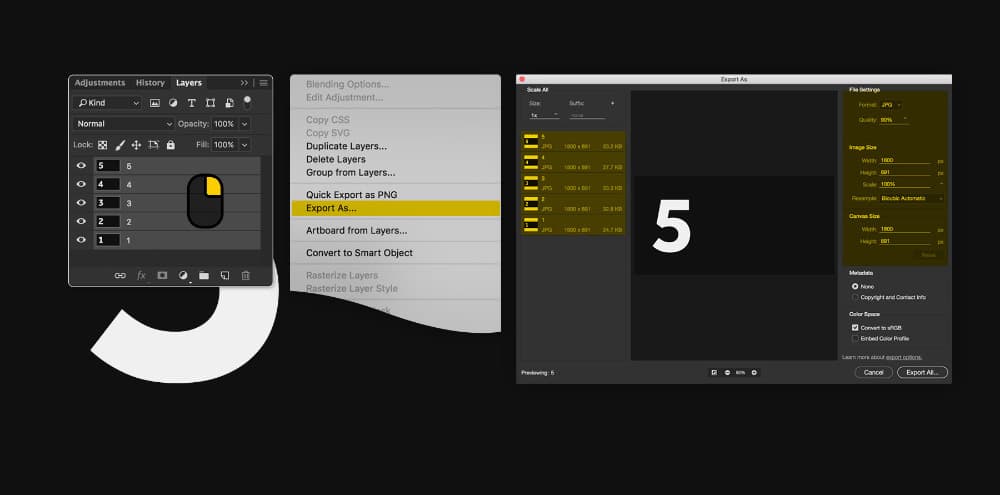
To save several layers at once into separate files, simply highlight them and clicking right mouse button, select Export As… and in the window that appears, you can change the size, select the required format and
Source: feelfactory.pro
…
