
Darkness Fall: Turn Day Into Night With Photoshop
Darkness Fall: Turn Day Into Night With Photoshop
In his article “Turn day into night in Photoshop,” designer and writer Ben Secret explains how to turn a day in a photograph into a night, what it takes and how long it takes such a metamorphosis.
According to Ben himself, he was inspired to create this lesson by the special effects in the film Melancholy by Lars von Trier, in particular, night landscape photography of a moving subject in the absence of the ability to use a slow shutter speed.
How can this problem be solved? Let’s get a look.
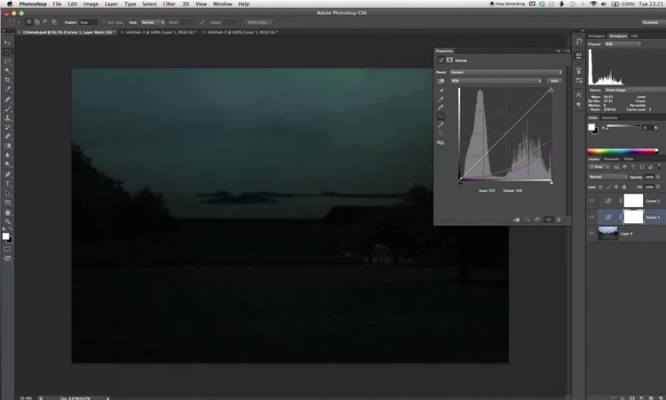
Adding a Curves layer

The source will be a photograph of the landscape taken in the daytime. With the image open in Photoshop CS3 or later, we add a Curves adjustment layer. Now we simulate twilight, making the light colder: this can be achieved by lowering the upper right marker of each of the channels (Red, Green, Blue) by 60%. The indicator may vary depending on the features of the image, but, as a rule, the lion’s share of manipulations will be associated with raising the Green channel marker and lowering the Red marker.
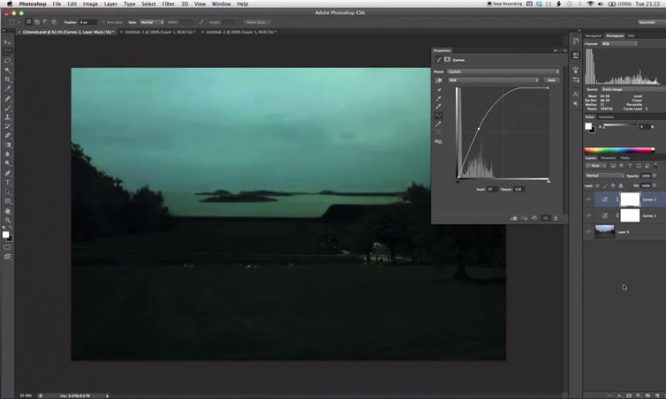
Correction of shades
Moving on to fine-tuning the middle tones of the tonal range. Often there is a need to make them a little warmer – for example, the grass seems too blue, while the color of the sky suits us. In this case, omit the center marker of the Blue channel. In general, color correction at this stage involves work similar to the previous one, but with the middle area of each of the channels.
Curve Dodge technique
The grass is still overly dark, so it’s time to add some moonlight with another Curves adjustment layer, or the Curve Dodge technique. Bring up the middle tones on a new layer to create a shine effect and apply Hide All. Then use a white freestyle brush with blurred edges to lighten the layer mask.
Post-regulation of colors
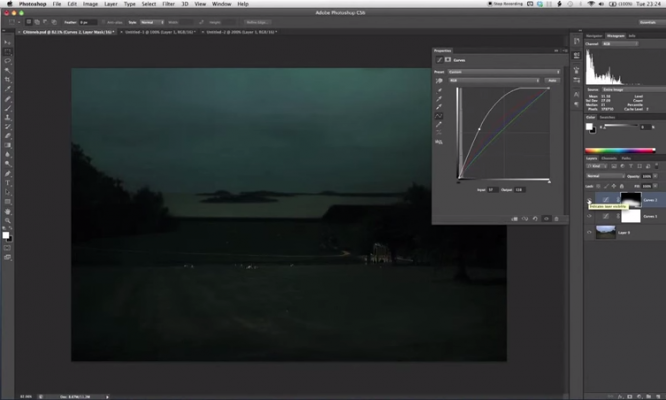
Curve Dodge is good because it allows you to further correct the resulting shades. Let’s go back to the channels and make the image a little warmer by raising the Red curve. In order to bring the color of the treated areas in line with the glow of the moon, raise the Blue curve. To emphasize the glow effect, as well as hide the artifacts that have revealed themselves, you can slightly soften the layer mask. That is, after activating it, apply the Gaussian Blur effect with a range of 50-100px.
Adding the moon
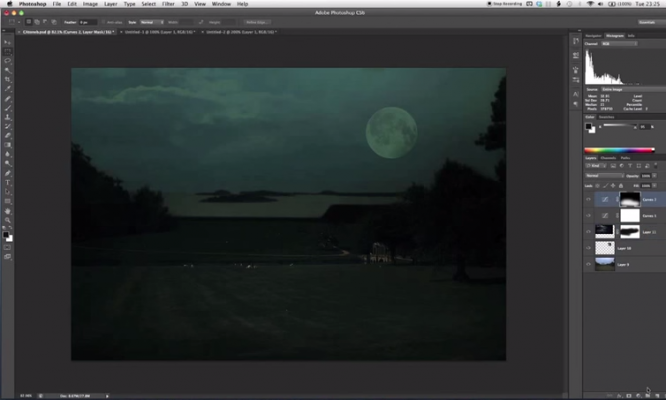
The final touch of our transformation is the Moon. We insert images of her and several clouds: note that the clouds must be initially at night, filmed at the appropriate time of day. Adjust the size of the elements using Free Transform, determine their localization in space and select the Screen blending mode for both layers. Hide them with a mask if necessary. It’s all. With proper skill, the procedure takes about 5 minutes.
Translated by: Denis Strigun
…
